You might have seen a lot of animated GIFs floating around the web. GIF is basically a lossless format for images which supports both static and moving images. GIFs have been moving around the internet for quite a long time now. They have an instant great impact on the person viewing them. They are more interactive than still images and very less time consuming than videos. GIFs can make the content more relatable and much more convincing. These little animations of 2-3 seconds are probably ruling the internet nowadays. We will be using Photoshop to create our own GIFs.
Also Read: How to Quickly Create and Send GIFs on WhatsApp for Android
Now, you might have a question of how these GIFs are made. You know about images and videos as these are the most common on the internet. But GIFs involve a specific different procedure to be developed. You can make GIFs to improve the quality of your content or simply experiment with them. Today in this article we will learn how to make animated GIF in Photoshop. The process is rather easy and requires Adobe Photoshop to be installed on your system. Photoshop has served as one of the great tools for editing and creating creative content. Follow this link to get the software. This how-to guide will involve making GIFs using the same software. So without further ado, let’s get started with the tutorial.
How to make your first animated GIF
Step 1: Get your images in Photoshop
This step can basically involve two scenarios. One being you already have your created images to be uploaded into Photoshop. While the other being you have to create the series of images required. So let’s get started with the first scenario. We are creating our own series of images in this tutorial, so basically we are following the second scenario.
If you already have the images:
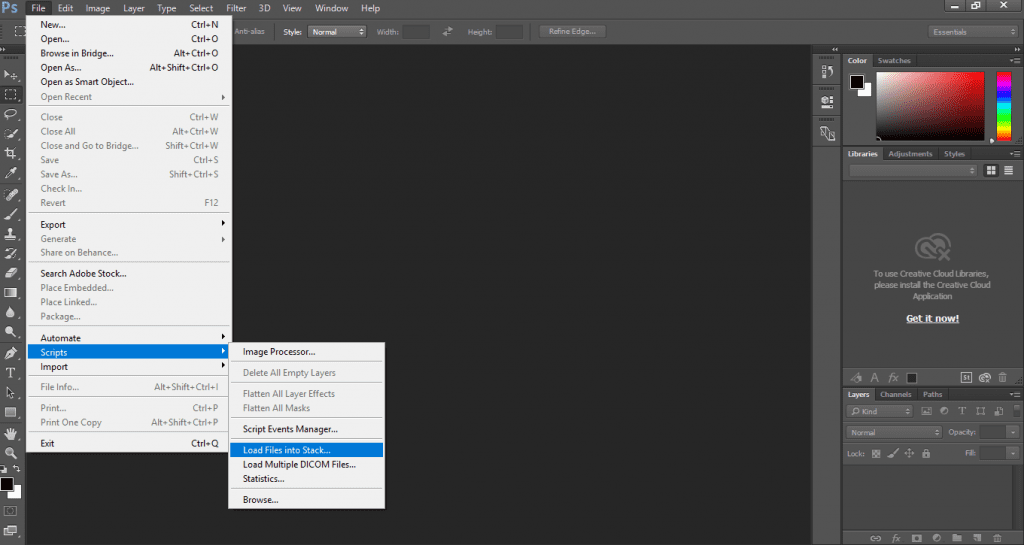 We would recommend you to gather all the images in a single folder. You can get them onto Photoshop by simply clicking on File > Scripts > Load Files into Stack. After this step simply click on browse and select the files you would like to use in your GIF. Complete this step by clicking OK. This will create a separate layer for each of the images you uploaded.
If you don’t already have the images:
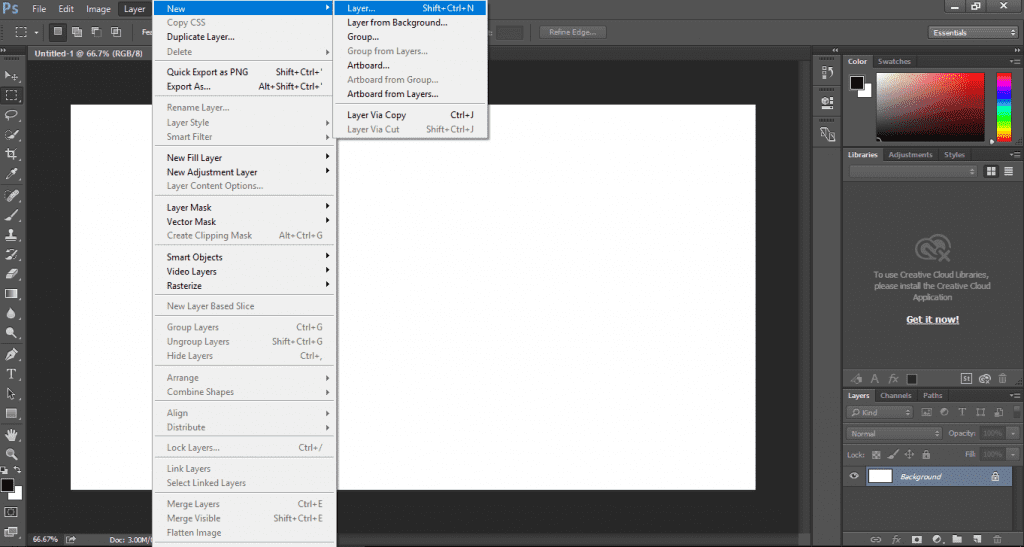
For this step, you would need to create each frame of your animated GIF as a separate Photoshop layer. A new layer can be added by navigating to Layer > New > Layer. You can create layers for each image you create or simply create a single layer for different items. It all depends on how you want your GIF to come out. The process is pretty easy and it will become easier as we move ahead. A good practice is to name your layers in such a way that you can easily track them afterwards when the need arises. To name the layers you can simply move to the layer panel which is placed on the bottom right of the screen. After this double click on the layer name and change it as appropriate.
If you would like to see how all these layers will look in a single frame than just turn visibility on for all layers. Now use Shift + Ctrl + Alt + E on Windows or Shift + Command + Option + E on Mac to merge the layers. This will merge your layers and show all selected images in a single frame. Photoshop creates a new frame which contains the merged content.
Step 2: Open up your Timeline
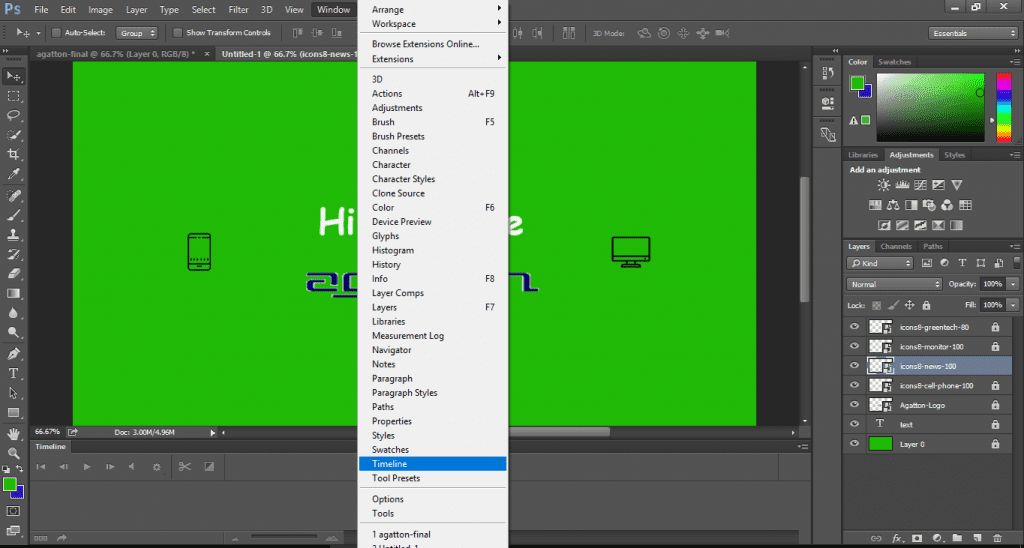
After you have successfully imported your images to Photoshop, it’s time to move on to Step Two. Open up your Timeline by selecting the “Window” option on the top navigation bar. Further, click on “Timeline” to open the timeline window. The Timeline feature allows you to toggle the visibility of different layers for different periods of time. The timeline window appears on the bottom of your screen.
Step 3: Create Frame Animation

If you successfully opened up your timeline window, we are pretty much good to go. In the timeline window, there will be a drop-down menu right in the centre. Open up the drop-down menu and select “Create Frame Animation“. This will make your timeline look something like this:
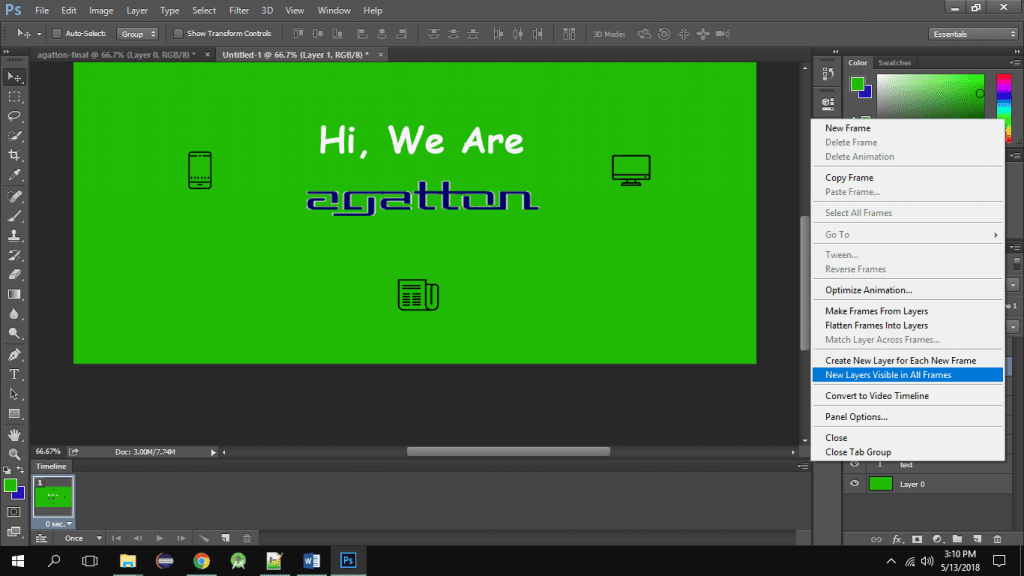
Step 4: Create a new layer for each frame
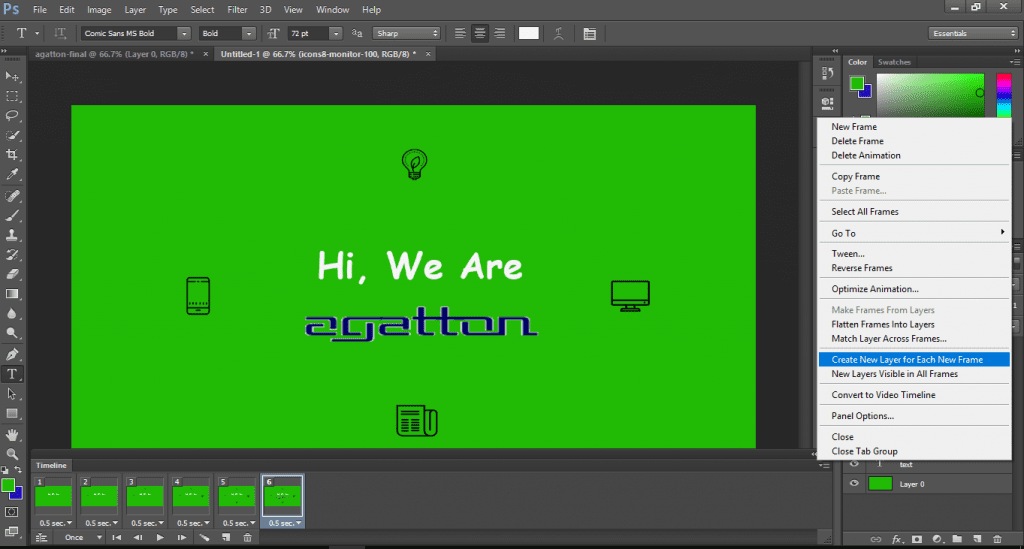
Now you need to create a new layer for each frame. To accomplish this step, select all the layers in your project by choosing “Select” from the top navigation menu. After this choose the option to select all layers. So basically you need to navigate to Select > All Layers. After this step is done click on the little menu icon on the timeline window. This option will be available on the top right corner of the Timeline window. This opens up a menu, from where you need to select “Create a new layer for each new frame“. This option will then create a new frame for each frame in your project.
Step 5: Make frames from layers

If everything is going well and good till this step, we are pretty much done with the process. From the same menu choose “Make Frames from Layers“. This will create each layer a frame for your in the making GIF.
Step 6: Select how long a frame should appear before moving onto to next frame
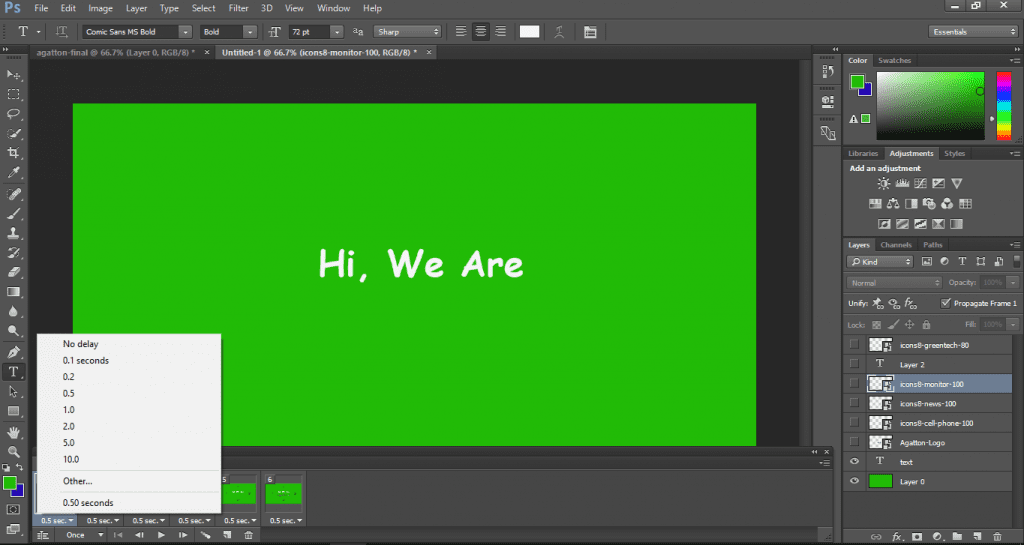
After the frames have been made for our new GIF, we need to select the time for each frame. To do this select time below each frame and choose appropriate timings for your frame.
Step 7: Select the time you would like each frame to loop
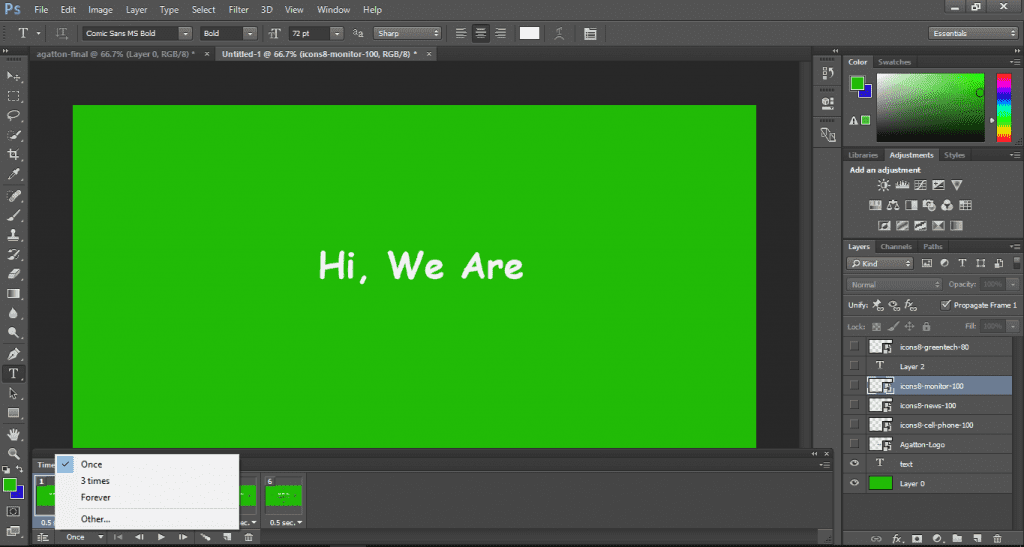
This option is by default set to Once, but you can set it according to your needs and choice. You can select from pre-defined options of “Once”, “3 Times” and “Forever”. For custom repetitions, you can select the other option and specify the count there.
Step 8: Preview and Save your GIF
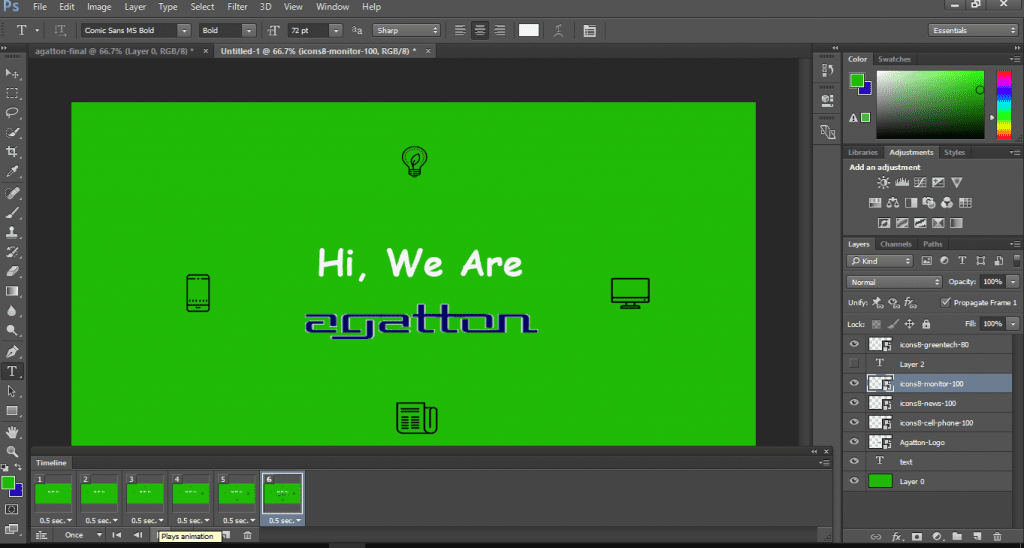
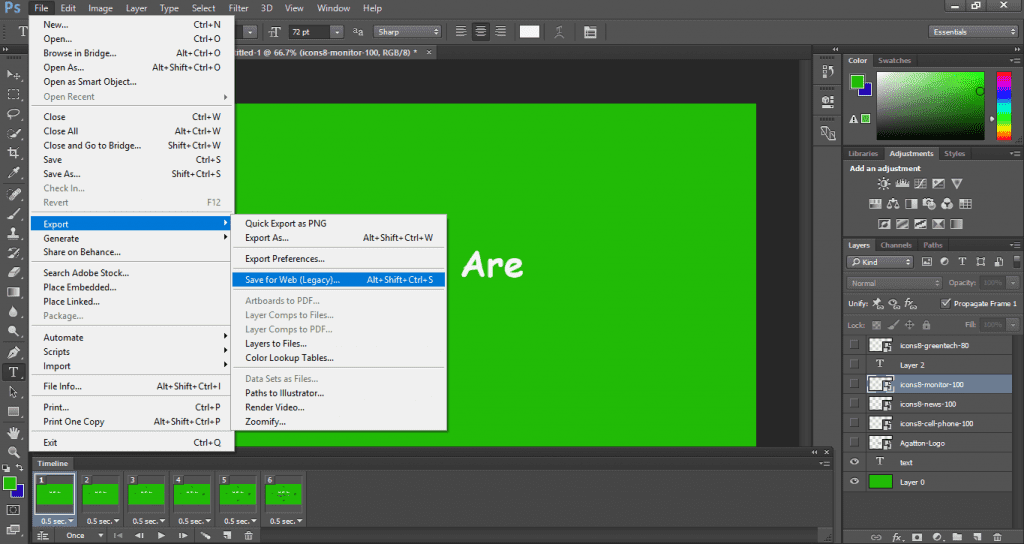
You can preview your GIF by tapping on the play option. This will play you GIF and if you are happy with it, it can be saved to your local machine. You can save the GIF by clicking on File > Export > Save for Web (Legacy).
After this, you need to choose the type of GIF file you would like to create.
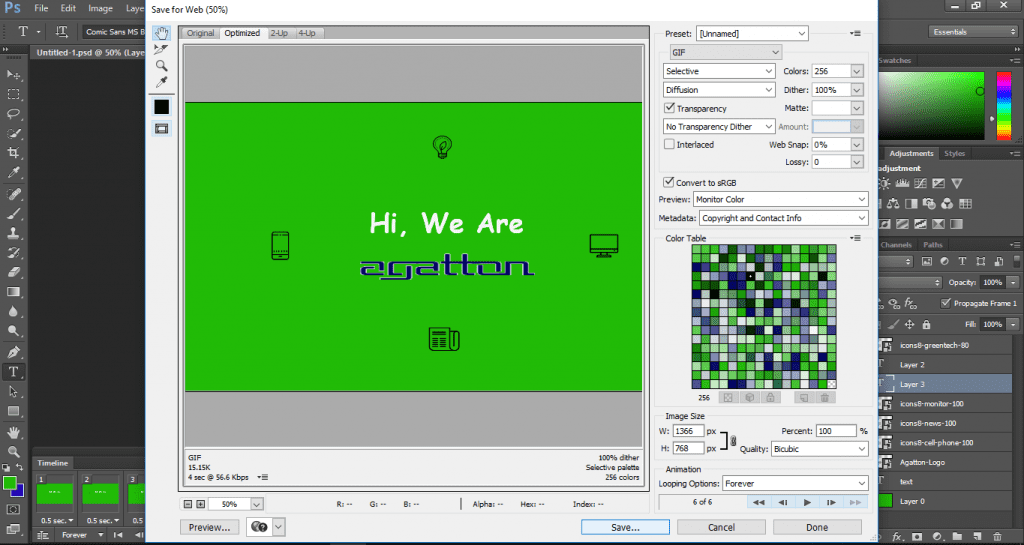
These options can be found under the preset drop-down menu. You can select your option based on the type of GIF you are exporting. If you have a GIF with gradients, choose Dithered GIFs to prevent colour banding else you can choose accordingly.
After you are all set, click on Save option present at the bottom of the window. Now we are ready to publish your newly created GIF.
What we Created
We created a little something during this tutorial. Do share your creative ideas that you create on your Photoshop. And do share this article with your friends who would love to create GIFs of their own. So here it is what we created in our tutorial.


Thank you Vidit for sharing this helpful blog..
Keep updating with Photoshop blog..