If you have ever been to the world of rooted android devices, chances are you probably know what Xposed Framework is. For those who are new, Xposed is a framework that lets you install some small and big customizations known as Xposed modules. These modules can customize the looks and functionalities of your device on the fly. You don’t have to flash a new ROM or follow a page long lengthy process to get a new feature on your device.
The Xposed framework lets you download modules that can do a number of things on your device. As of now the community is very well supported and new features added to the latest editions of Android are Xposed very quickly. This makes the whole process of having new features and customizations on your device faster and more flexible. You don’t lose anything but what you gain are new modifications. This is our guide on how you can install Xposed on your device. So without further ado let’s get started.
Note: We will be using TWRP to flash the Xposed framework on your Android device. As we are starting from the very beginning, a basic guide to unlock your phone and install TWRP is also included. So if your phone already has TWRP you can skip to Step four.
Step Zero: Backup all your data
Okay, so first things first we need to backup all your data. Backing up data is very important because this process will clear up all the data on your phone. You can back up your application settings on Google cloud and retrieve them back again when you log in. The data on the physical partition can be saved somewhere on your computer. There are a lot of backup tools available on the web which can help you save all data. Contacts and other things are by default saved to your Google account data, so you need not worry about that.
Step One: Unlock your Bootloader
Unlocking your bootloader is the very first step when flashing custom ROMs. We have a detailed guide where you can find all the info on how to unlock your bootloader. Our recommendation is that you go through the guide and unlock your Bootloader. We still have some basic steps to unlock your bootloader.
- Download Android Platform Tools from here. Unzip the file and save it on your computer.
- Enable USB debugging on your device by going to Settings >> Developer options >> USB debugging >> Enable.
- Also enable OEM unlocking by heading on to Settings >> Developer options >> OEM unlocking >> Enable.
- Connect your phone to your computer via USB cable. Allow USB debugging on the phone when prompted.
- Open command prompt in the root directory of Android Platform tools.
- Type the following command to check if your devices are connected
adb devices
- Unlock your bootloader by typing in the following command.
fastboot oem unlock
- After the process is complete reboot your phone.
Here is another detailed guide on how to setup ADB and Fastboot.
Step Two: Install a custom recovery
Well, installing a custom recovery is the very first step to get things rolling. It allows you to flash custom ROMs, backup your phone data, restore from backups and much more. Each phone has a specific procedure to install a recovery, so we will get you started in this posts with the basics. We will be giving directions on how to proceed further. Before starting off with the procedure, make sure you have backed up your data.
Here are the things you would be needing to start up:
- A rooted android device
- A USB cable
- USB drivers
- Custom recovery flashable zip
- Android SDK
Step 1: Install USB drivers
You need to find specific drivers for your device. These drivers will enable your phone to be recognized by your computer. They will allow your Android device to interact with your computer. Here are some links to most popular devices. Otherwise, you can check for device drivers on your OEMs website.
Step 2: Choose a custom recovery
You can download any one of the two most popular recoveries TWRP or ClockWorkMod. You can download the specific file for your device following the embedded links.
Step 3: Flash Recovery File
To flash the recovery file on your device you need to find a guide with specific instructions. Many devices make flashing custom recovery easy. Now you have the basic things to get yourself started to flash a custom recovery on your phone. You can check XDA to find specific custom recovery flashing guide for your phone.
Step 4: Download the Xposed Installer Zip
Note: Xposed Framework works well with near stock Android devices. Furthermore, it has been spotted to run just fine on other ROMs if your ROM is heavily customized it might give you some problems.
- The next thing we need to do is download the Xposed Installer Zip. If you are having a device which runs on earlier versions than Lollipop 5.0 (chances of which are pretty low) than you can head over to this link. Furthermore, devices running on Android 5.0 or higher, you can follow up this link.
- Download the Xposed Installer Zip corresponding to the Android version your device is running on. Also, make sure the zip you have chosen matches your device’s architecture.
- After the package has been downloaded to your device transfer it somewhere accessible and remember the path to the zip.
- Boot your phone into Recovery mode by pressing the Volume down and Power button simultaneously for about 10 seconds.

- Tap on the option to Install from the TWRP main menu.
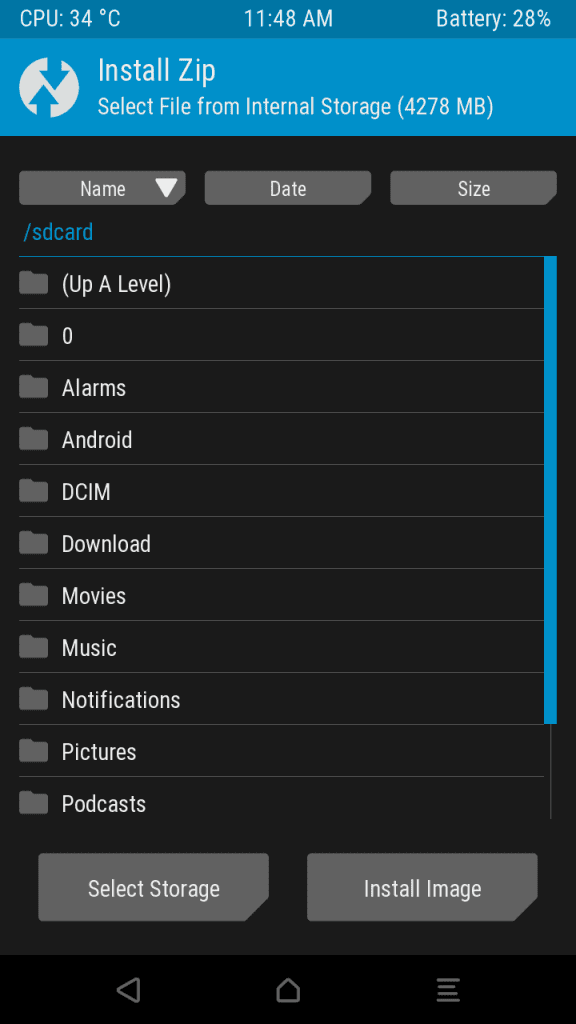
- Now navigate the location on your device where you the Xposed Installer Zip and choose the file.

- Confirm the flashing of Xposed Zip by Swiping the ‘Swipe to confirm Flash’ button.
- After the system has finished flashing the zip file on your device choose the option to reboot the system.
- Now when your device has turned on after the reboot, head on to this XDA thread to download the Xposed Installer.
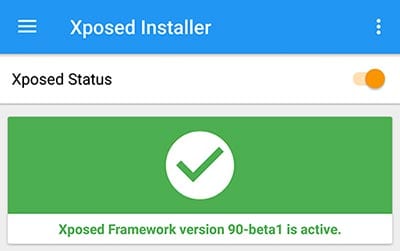
- Install the app and it will show you the status of Xposed Framework as active which confirms that you have successfully installed Xposed on your devices.
- Now go on and enjoy the new possibilities with your same device.
We hope you have liked our content and will help us to move our content around the web. You can always show some love by sharing our article with your other friends.


