Android is an open source software and is by far the most popular operating system in the market. A large community of developers supports the Mobile OS and the ecosystem of apps is a boon. Android users love the customizability the OS offers. To customize their phones users constantly try to have new features on their phones, as they release. But thanks to Android manufacturers, updates are really slow. That is where custom ROMs come into the picture. But first bootloader should be unlocked.
Custom ROMs provide new features with latest versions of Android. Moreover, the ROMs offer a greater level of customizability. But there are certain steps you need to follow in order to flash custom ROMs on your device. The very first step is unlocking your phone’s bootloader and this is what our guide is all about. We have made a list of steps which will help you to unlock your device’s bootloader.
The bootloader is the first piece of code that is triggered when you turn on your device. It contains the programmatic instructions to load the operating system and the necessary files to get everything startup. The good part is that bootloaders can be unlocked and you can flash custom ROMs. But the bad part is, not all devices will let you do it. Unlocking bootloaders is dependent on the OEMs. Some manufacturers allow their bootloaders to be unlocked and some don’t.
Obviously, there are ways which can help you do the trick and you can find one for your device on the web. You can always take help from the vast ocean of guides on XDA. OEMs like Motorola, Google and HTC allow unlocking of bootloaders and you can even find the process on their official websites. Without further ado, let’s get started with the process.
Backup and transfer your data somewhere safe
The very first step before attempting some tweaks to your device should be to take a backup. This process is anyways going to erase data on your phone, so beware. You can create a backup from the built-in function in Settings. The feature allows you to backup app settings and keeps them safe in the cloud. So, the next time you log in with your same account, all your settings are retrieved from the server. Furthermore, copy data from your device and save it on your computer. When the backup is all complete, follow on with the next steps.
Install Android Platform-Tools and drivers
We have detailed guide to walk you through the process of setting up ADB and fastboot. These are the basic steps to follow. For further information, you can follow up here.
- Go to the Android SDK Platform-Tools page. Here you will find the latest version of ADB and fastboot.
- Choose a suitable package for your operating
- After reading through the terms and conditions, check I have read and agree to conditions.
- Download the SDK tools for your platform. Save the file on your local storage and remember the location. We will need to access it in a short amount of time.
- Extract the downloaded ZIP before proceeding further. At this point in time, you have ADB and fastboot technically setup on your computer.
- We will be coming up to Platform-Tools later first let’s move on to install drivers for your device.
- To connect your device to your computer, you will be needing specific drivers for your phone. You can download OEM specific drivers from the below links. If your OEM is not mentioned in the below list, you can head on to your device manufacturer’s website. There you can download drivers specifically for your phone.
- After all this is set up, connect your phone using the USB cable and go to the directory where you unzipped the Platform-tools. Open Command prompt from the current directory. This will open up command prompt on your machine with its root at the Platform-Tools directory.
- Enter the following command at the command prompt.
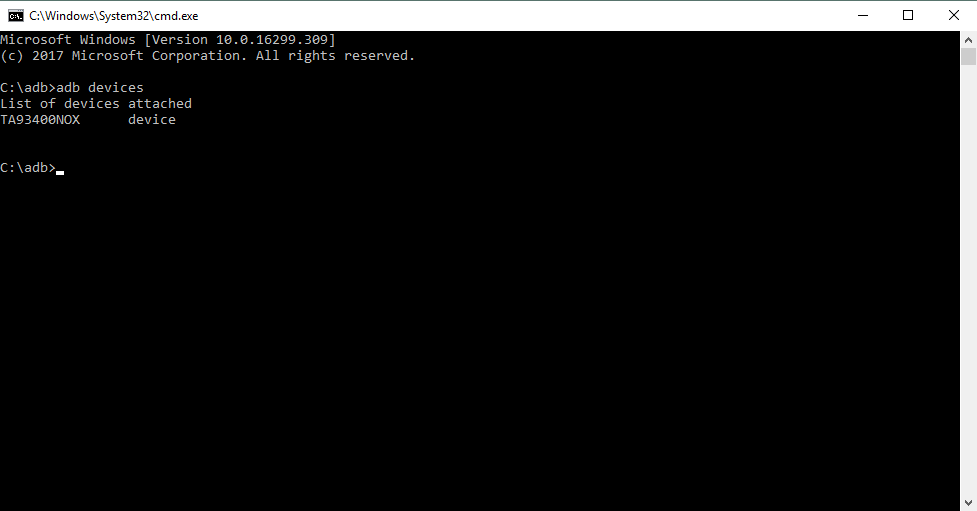
adb devices
- This command should show up the serial number of your device. This confirms that ADB has been successful in recognizing your device. If the process fails than recheck if you have performed the above steps correctly.
Enable USB debugging on your phone
After the previous step, we have the basic essentials setup, to perform the process. The next step you need is to enable USB debugging on your phone. If you have Developer options enabled on your phone, then this reduces the number of steps for you. In order to enable developer options, Go to Settings >> About Phone >> Tap on Build number seven times. This will enable Developer options on your phone. You can find the newly discovered setting on the main Settings page.
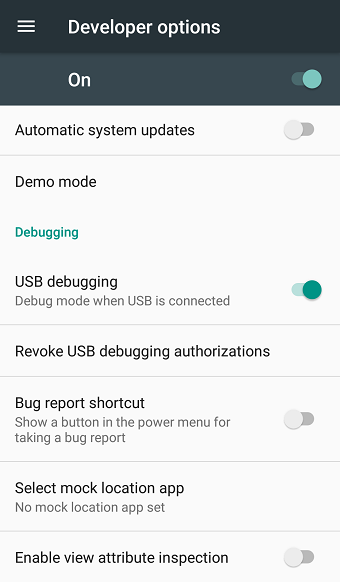
After this is done, tap on Developer options >> USB debugging >> Enable.
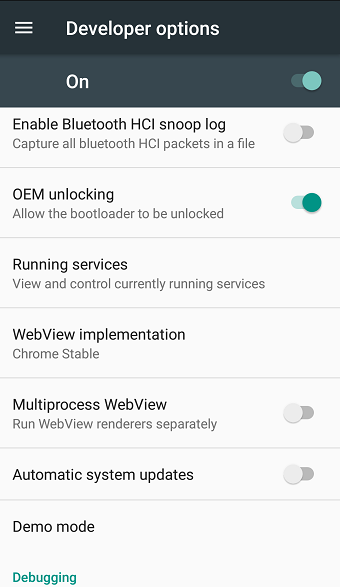
Moreover, enable OEM unlocking too by going to Developer Options >> OEM unlocking >> Enable. Now go on and connect your phone to your computer via USB cable. A dialog will pop up on your screen asking your permission to “Allow USB Debugging“. Tap on “Always allow this machine” and click OK.
The final Step: Unlock your phone
As we have set up everything we require for this process, it’s now time to come to the climax. The final step is to unlock the bootloader to open the gateway to the whole new world of customizations. Connect your phone to the computer via USB cable. If you are not already in fastboot mode, turn your phone off. Now hold the “Power” and “Volume Down” keys together for about 8 seconds. The moment you release the keys your phone should boot in fastboot mode. Now on your computer go to the ADB and Fastboot directory. Open the command prompt from there. Now get ready for the final moment to unlock your bootloader. Type in the following command to unlock your bootloader:
fastboot OEM unlock
After you have finished the last step, reboot your phone. If every step has been followed correctly and nothing goes wrong in the code processing, you should see a message which says “Your bootloader has been unlocked“. After this message, your phone will boot normally. Some OEMs display the unlocked bootloader message as a warning. Furthermore, it is a good practice to boot into Android for the first time, after performing this step. After this, you are free to perform any customizations on your device. Just make sure you follow guides strictly, to not run into problems. Finally, enjoy your unlocked new world of customizations.
Also Read: Download Android Multi Tools


