You might have come across the term Hyper-V sometime while trying to set up a Virtual machine on your system. For those who are not aware of what Hyper-V is, it is a virtual machine software which allows you to run multiple operating systems at once. This can all be done on a single machine running Windows. Though Hyper-V has existed in our computers for a very long time now, only a small percentage of users actually use it. This is a great inbuilt feature which makes it easy to run different instances of operating systems under one primary OS. We are writing this guide to walk you through all the steps for installing Hyper-V on your system. Here is a step by step guide on how to proceed for Hyper-V installation.
Check if your system supports Virtualization
If you want to use Hyper-V on your system, the very first step is to check if your system supports Virtualization. Microsoft provides a pretty handy tool to check if your system processor supports virtualization. It is a Hardware-Assisted Virtualization Detection Tool. You can find the link to download the software here. Moreover, the program requires no installation and could be easily run by a double click gesture. It will tell you if your system supports virtualization or not. If virtualization is not supported by your processor than Hyper-V cannot be installed on your system.
Also Read: How to Install and Setup Linux Bash Shell on Windows 10
Check if virtualization is Enabled
After you have confirmed that your processor supports virtualization, we need to check if it is enabled or not. For many cases, the virtualization is not enabled by default in the BIOS. Now as different manufacturers have different BIOS, we cannot provide specific instructions. So, here is a list of generalized instructions on how to check and enable virtualization on your system.
- To enable virtualization, restart your computer and start pressing F2 or F8 keys as soon as the computer starts. This will take you to the BIOS. However, keys might differ for your system but you can find the specific keys for your system on the web.
- After you have entered into the BIOS, get into the advanced mode to modify various settings. This is typically done by pressing F7.
- Virtualization is a smart feature so you need to get into the advanced tab. In the advanced tab, we are concerned with the CPU Configuration.
- Once you are inside CPU Configuration you need to find a setting string labelled as AMD-V, Intel virtualization or Virtualization.
- Enable this option in the BIOS and save the settings. Do not play with any other options if you are not exactly sure what you are doing.
Note: However, the exact process to enable Virtualization might differ depending on the BIOS of the machine
Install Hyper-V
Hyper-V is not installed by default on Windows and in order to be used, we have to explicitly install the software. To begin with the process, we have to enable the Hyper-V tools from Windows Features list.
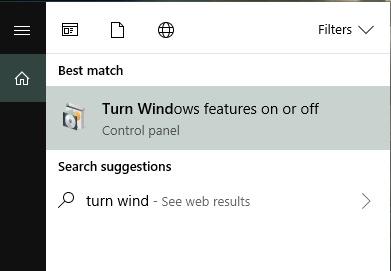
- To do so, click on the search bar and type “Turn Windows features on or off”. Now tap on the appeared option to turn on the Hyper-V feature on your system.
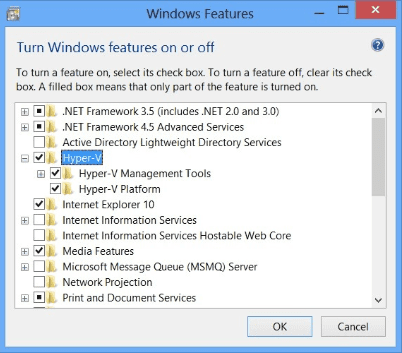
- After the Windows Features window is open find the checkbox labelled as Hyper-V. So now to get Hyper-V we need to enable the Hyper-V Management Tools and the Hyper-V platform under Hyper-V.
- Check both the options to enable the features. If the system doesn’t let you check the Hyper-V platform option and displays an error message which says “Hyper-V cannot be installed: The processor does not have required virtualization capabilities” than probably you have not yet enabled Virtualization on your computer. Revisit the Step 1 and Step 2 to check for virtualization capabilities.
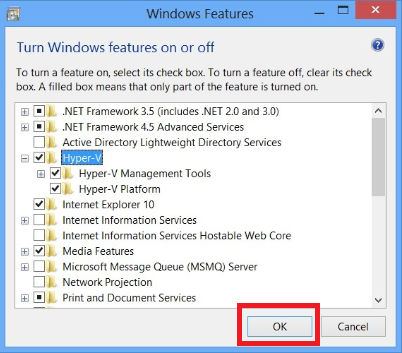
- Furthermore, after you have successfully checked both the options under Hyper-V in Windows features click OK. This will now initiate the process to install Hyper-V on your Windows machine.
- After the system has finished installing the requested software it will prompt for a reboot. Reboot the computer to apply the final settings required to enable Hyper-V on your machine.
Check if Hyper-V has been successfully installed
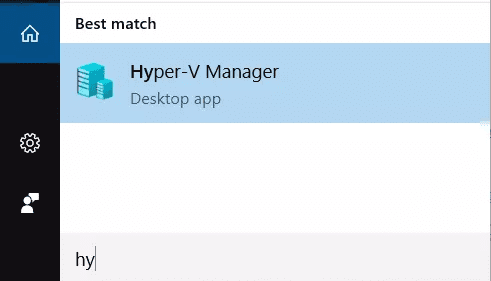
- After your system has restarted, click on the search icon and type Hyper-V in the search box. This would show up an option of “Hyper-V Manager”.

- Click on the option to launch the Hyper-V Manager. So this will allow you to create a new virtual machine which can run on the same instance of your current operating system.
Also Read: Windows 10 Game Mode: What is it and how to activate it
Did you find our article useful? Do let us know in the comments about your views and do help us spread this article to the masses by sharing it with your friends. If you think we have missed something here, you can always ping us and let us know.


