What is Raspberry Pi?
The Raspberry Pi is a series of single board computer which can be used to learn to program through fun and practical projects. It is a tiny affordable computer and is available to buy immediately.
The developers provide Raspbian, a Debian-based Linux distribution for download.
Buy Raspberry Pi from Amazon(US) or Amazon(IN)
Raspberry Pi as a network adblocker:
Here we will learn to configure our Raspberry Pi as an adblocker for our Wi-Fi network and block ad’s on all the devices connected to that network. It is an easy process and some of the features are as follows:
- Block over 100,000 Ad-Serving Domains
- Block Advertisement on Any Device
- Improve Overall Network Performance
- Reduce Data Usage
- Monitor the Statistics and Performance
- It is Free
How to Install Raspbian on Raspberry Pi?
Installing the OS for Raspberry Pi is a very easy process. Here are the steps on how to do so:
- Download Raspbian Image – here
Windows:
- Insert SD Card into your computer and check for the letter which is assigned to the drive. Ex: D; If you do not have an SD card reader use a cheap SD card reader.
- Download Win32DiskImage utility from here.
- Install Wind32DiskImage utility and Run it.
- Unzip the Raspbian Image zip file.
- Run Win32diskImage software select the Image file that you extracted and the SD card drive letter.
- Click on Write and wait for the write to complete.
- Exit the imager and eject the SD card.
Also Read: Turn an Old PC Into Wireless Torrent Box & Media Server
Mac:
- Connect the SD Card.
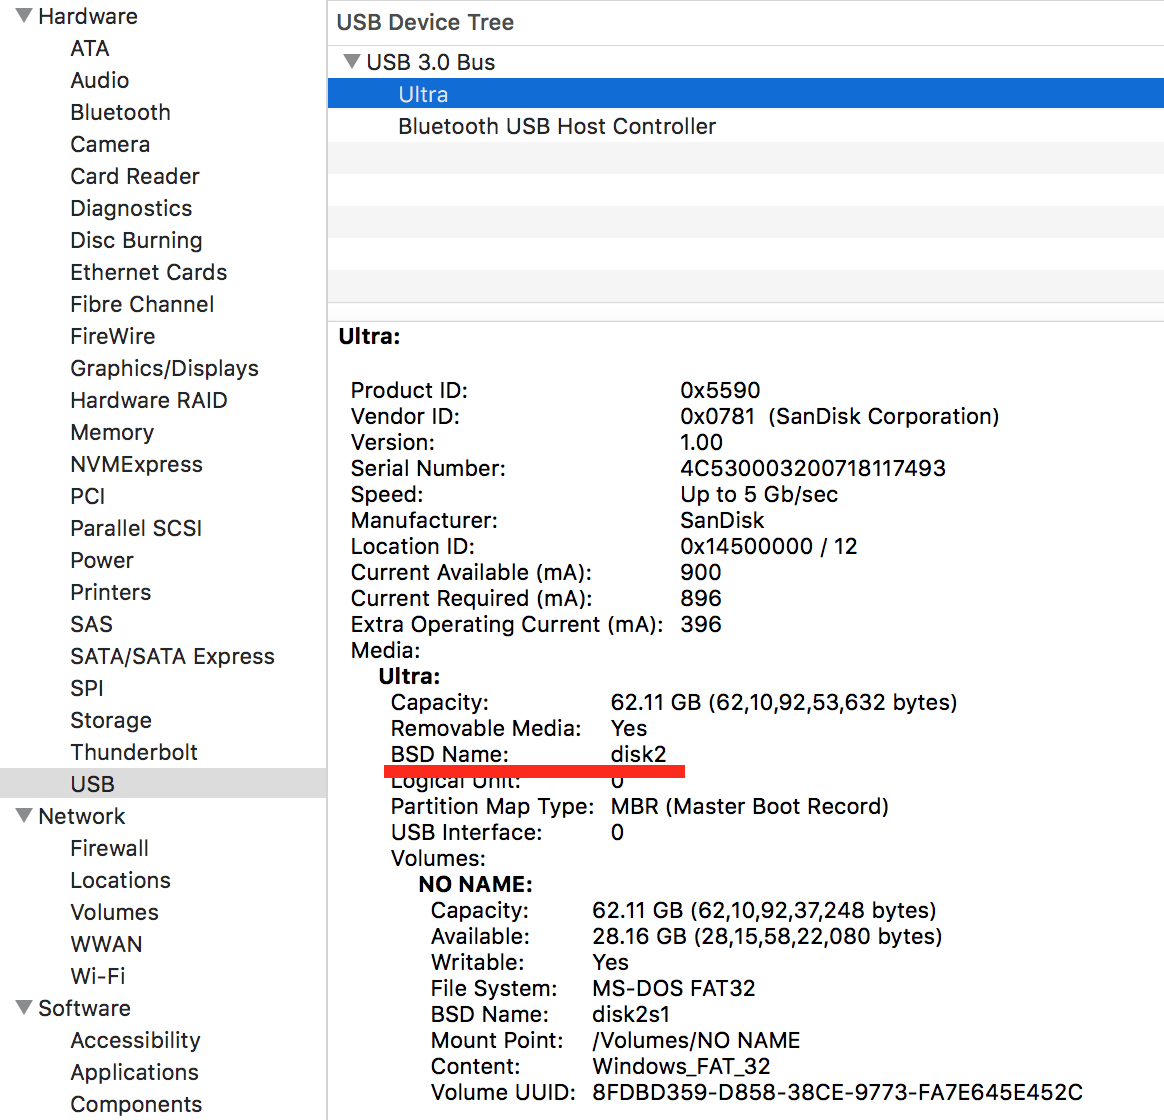
- From the Apple menu, choose “About This Mac”, then click “System Report”
- Click on “USB” or “Card Reader” if you are using the inbuilt card reader then search for your USB or card. Click on it and search for BSD name in the lower section. Take a note of this number.
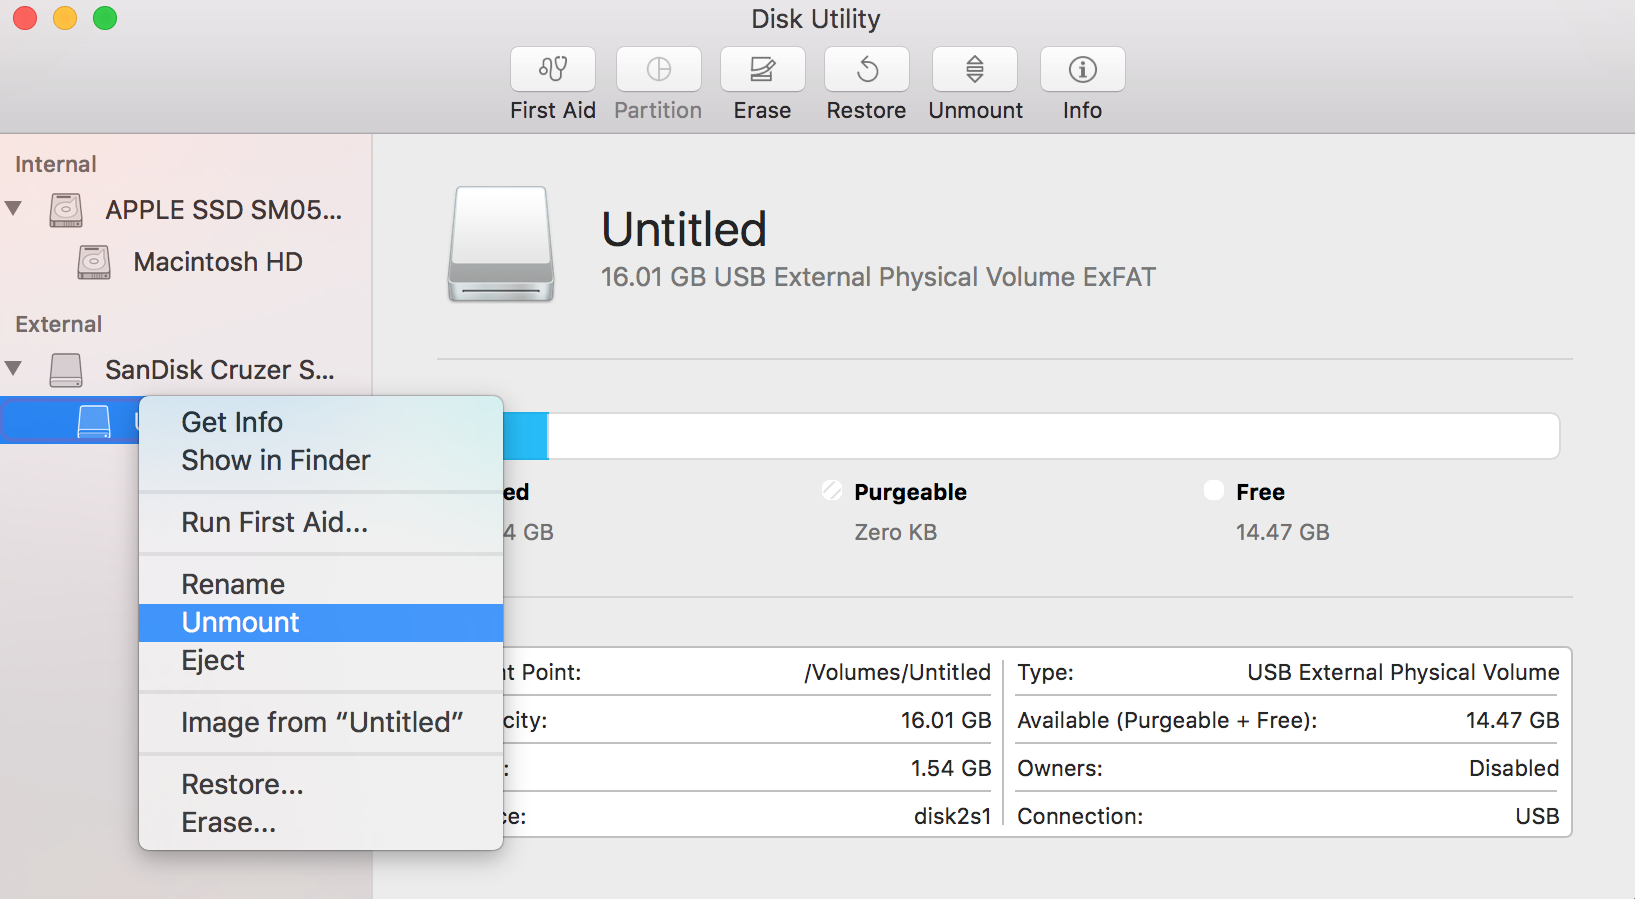
- Now unmount the partition so you are allowed to override the disk. Open Disk Utility and unmount it, do not eject or you have to reconnect the device.
- Now, open Terminal and run the following command:
sudo dd bs=1m if=path-of-your-image.img of=/dev/rdiskn
Remember to replace “n” with the number you noted before. Press Control+t to check the progress.
- If this command fails then try using “disk” instead of “rdisk”
sudo dd bs=1m if=path-of-your-image.img of=/dev/diskn
Wait for the process to complete, after which we will move on to the next part.
Now just put the SD Card in your Raspberry Pi and we are done.
How To Configure Raspberry Pi as Ad-Blocker using Pi-Hole:
- After Installation with above steps, power up your raspberry pi and connect it to the internet using ethernet.
- Find IP of your Pi and enable SSH using the guide – here.
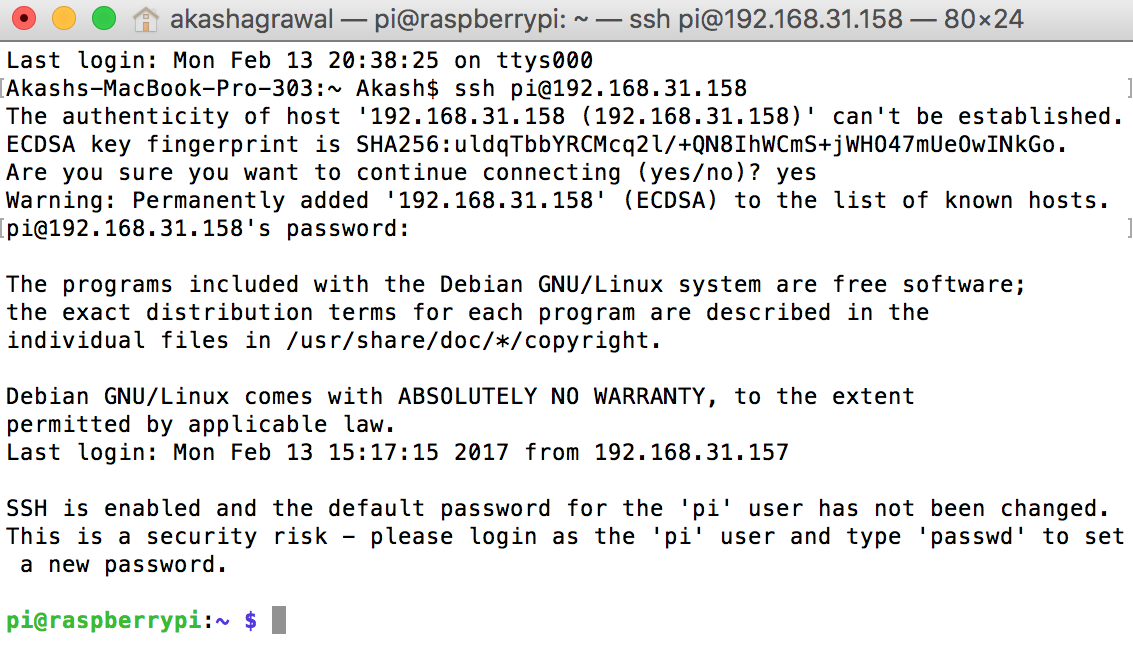
- Login to Raspberry Pi using mac terminal. Using the following commands, by default, the login name is “pi” and the password is “raspberry“.
ssh pi@your-raspi-ip-address
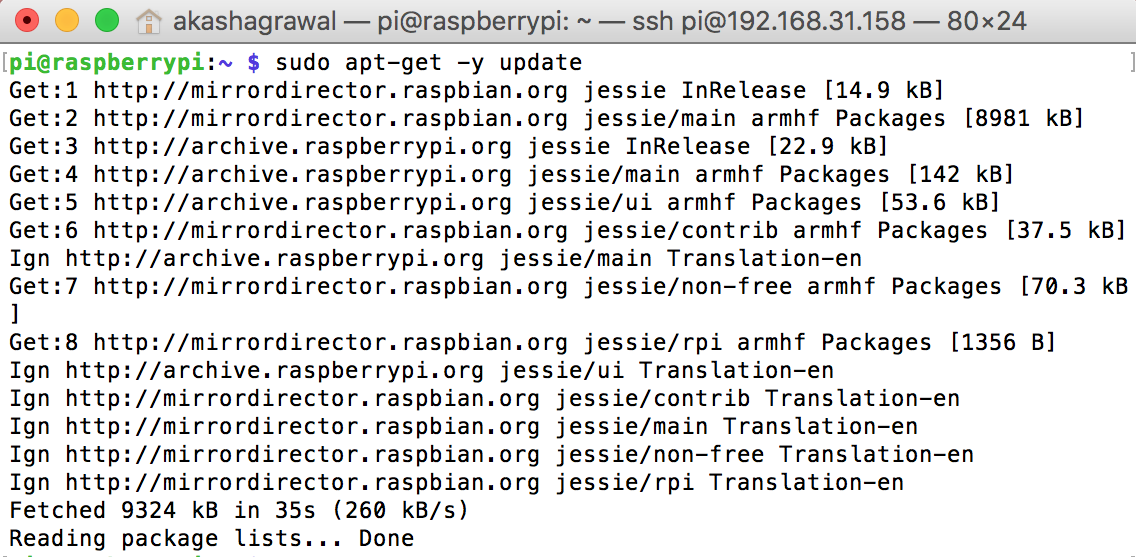
- First Update the package list using:
sudo apt-get -y update
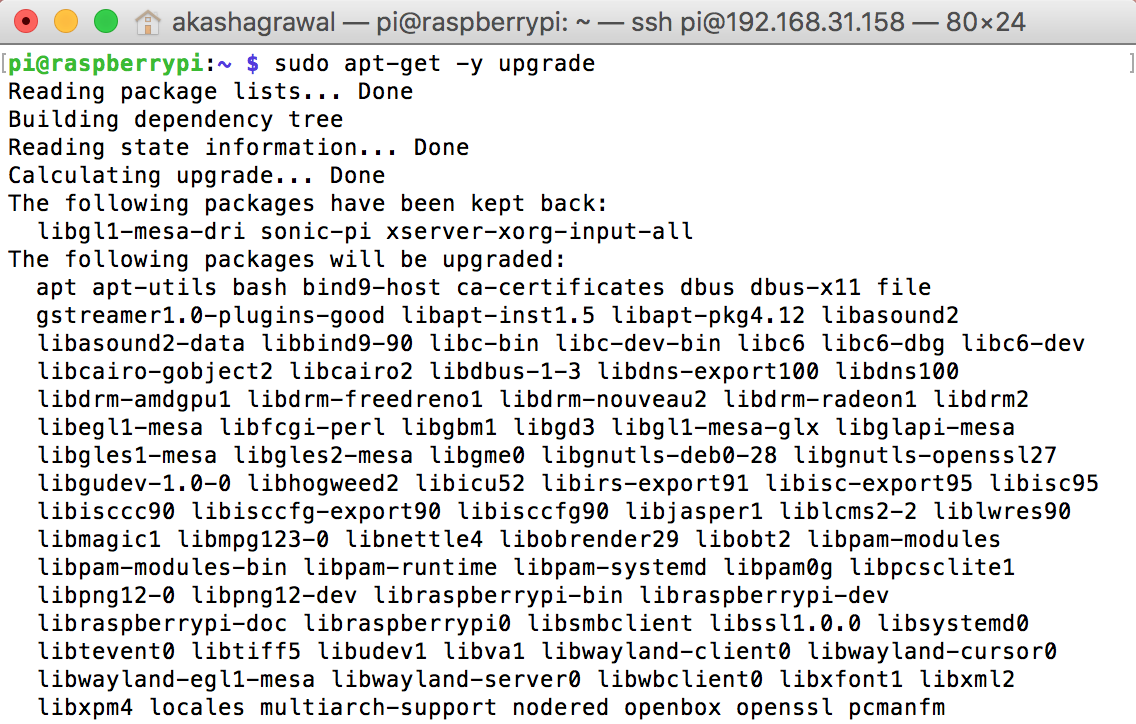
- Now to update the package themselves (this will take some time, please be patient):
sudo apt-get -y upgrade
- Now we need to set our IP as static so that it does not change when we reboot raspberry pi.
Firstly, Type the following command:
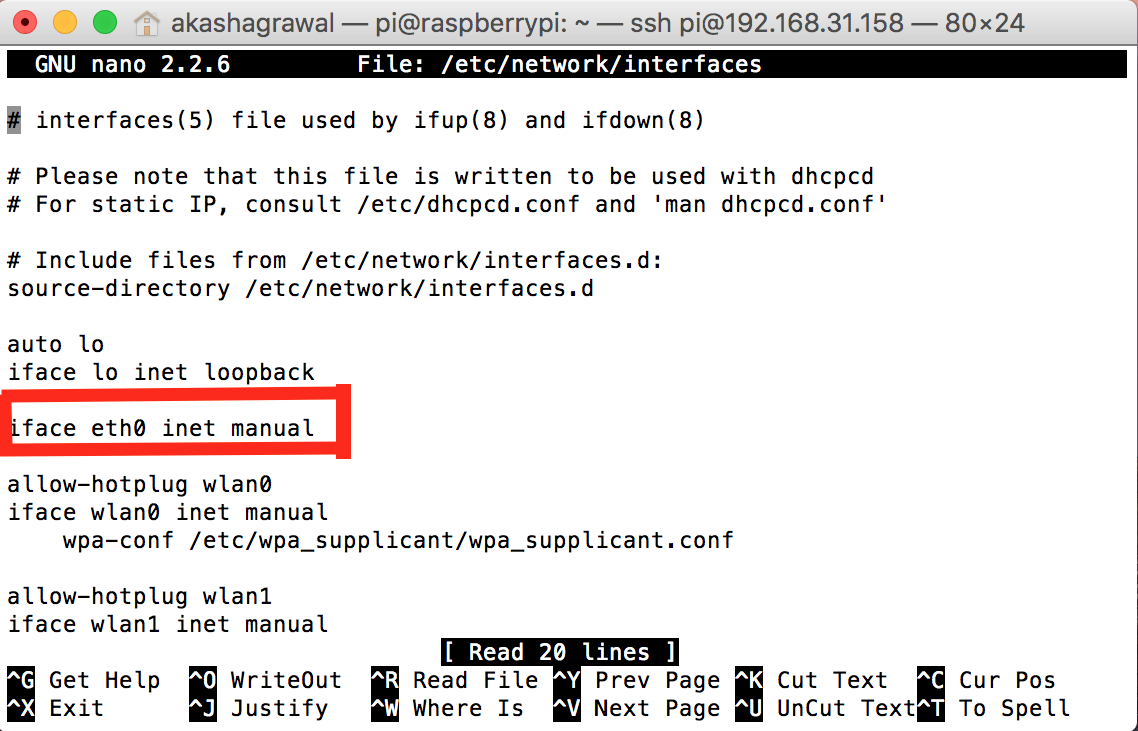
sudo nano /etc/network/interfaces
Next, change the below:
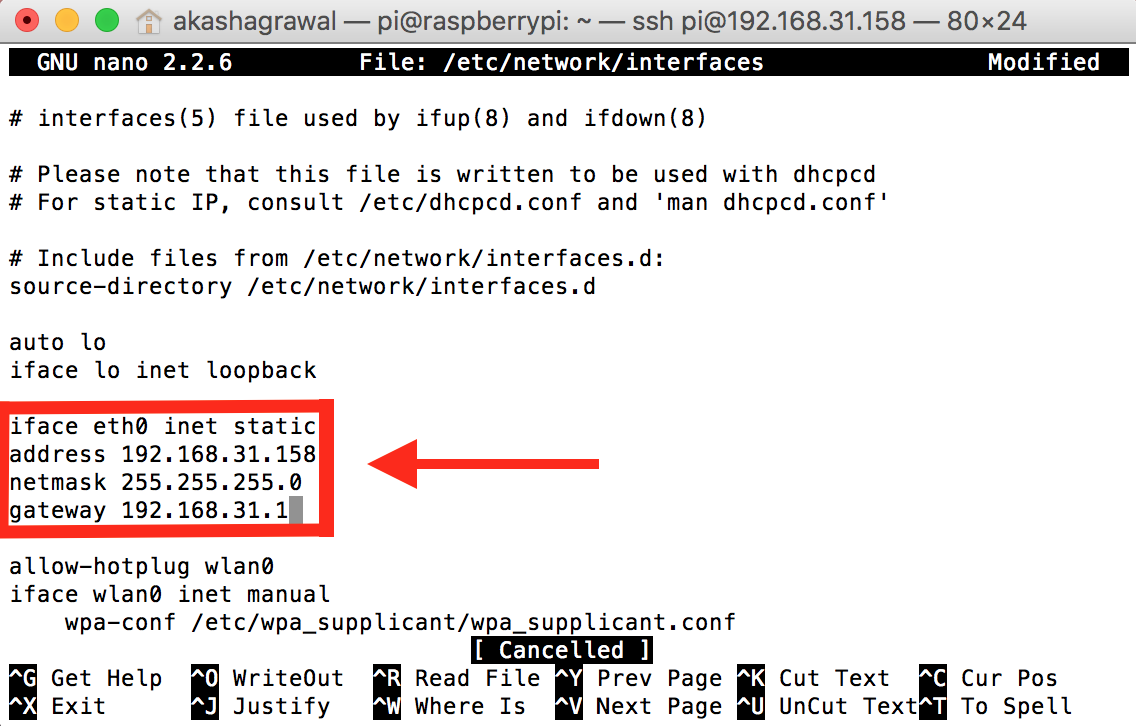
Lastly, change the above to:
Remember here address is your IP address and gateway your router’s address. Netmask should be same as above.
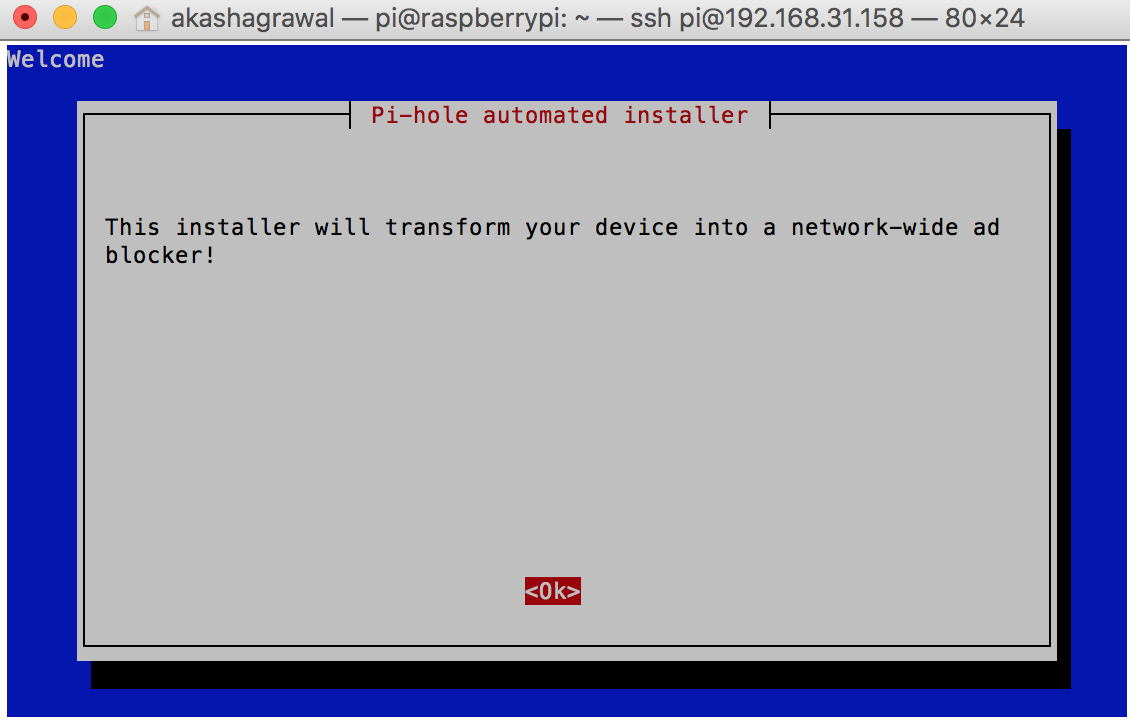
- Now to install the Ad-Blocker just enter the following command in the command line:
curl -sSL http://install.pi-hole.net | bash
- Click on Ok, Ok until you need to select DNS Provider, I prefer Google.
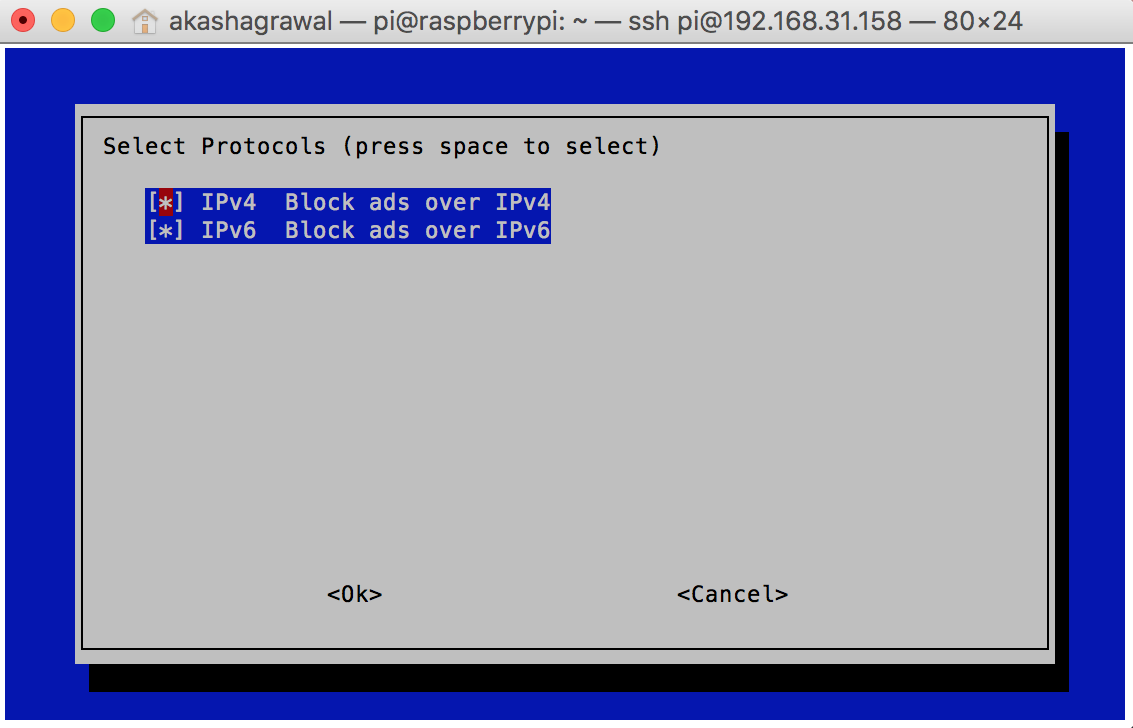
- Keep hitting Ok again till you reach the window below, Now select IPV4.
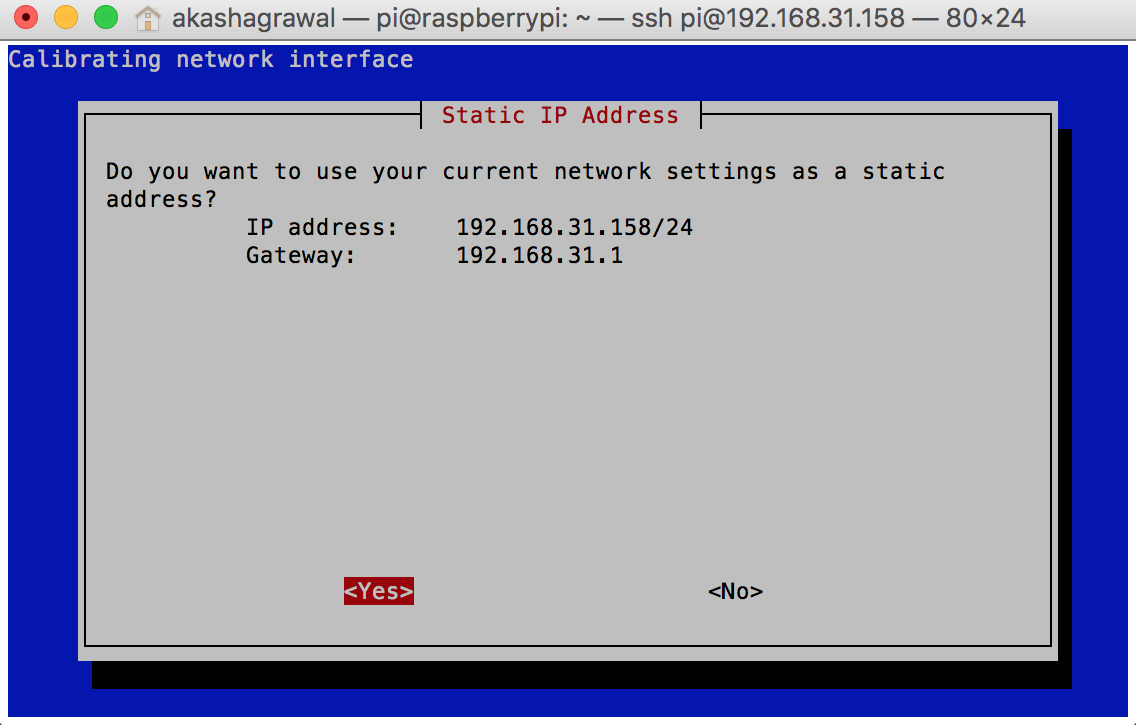
- Click Ok till It will ask you to use current settings as a static check and save the IP displayed.
- It will run some background commands and install Pi-Hole.
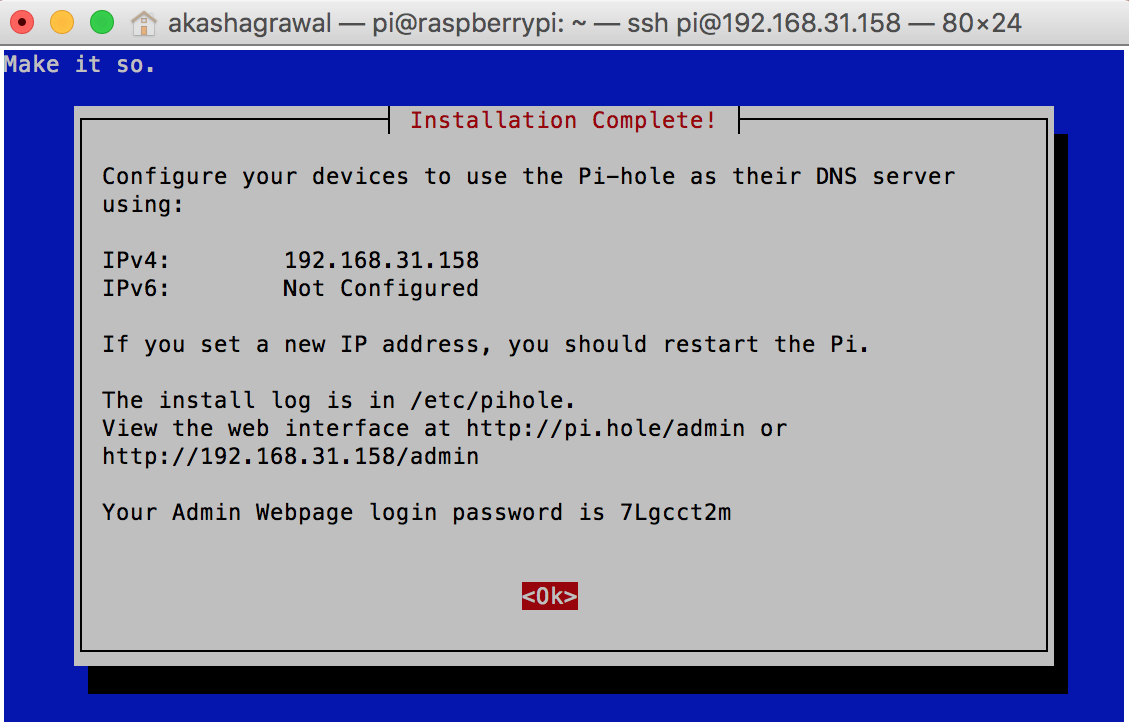
- After Installation, you will reach a page showing you the password to login to pi-hole to check all about it. Just save it.
- Reboot your raspberry pi after all this and this is all you need to do on your pi.
Now Configure Your Pi-Hole to your network:
- Login to your router
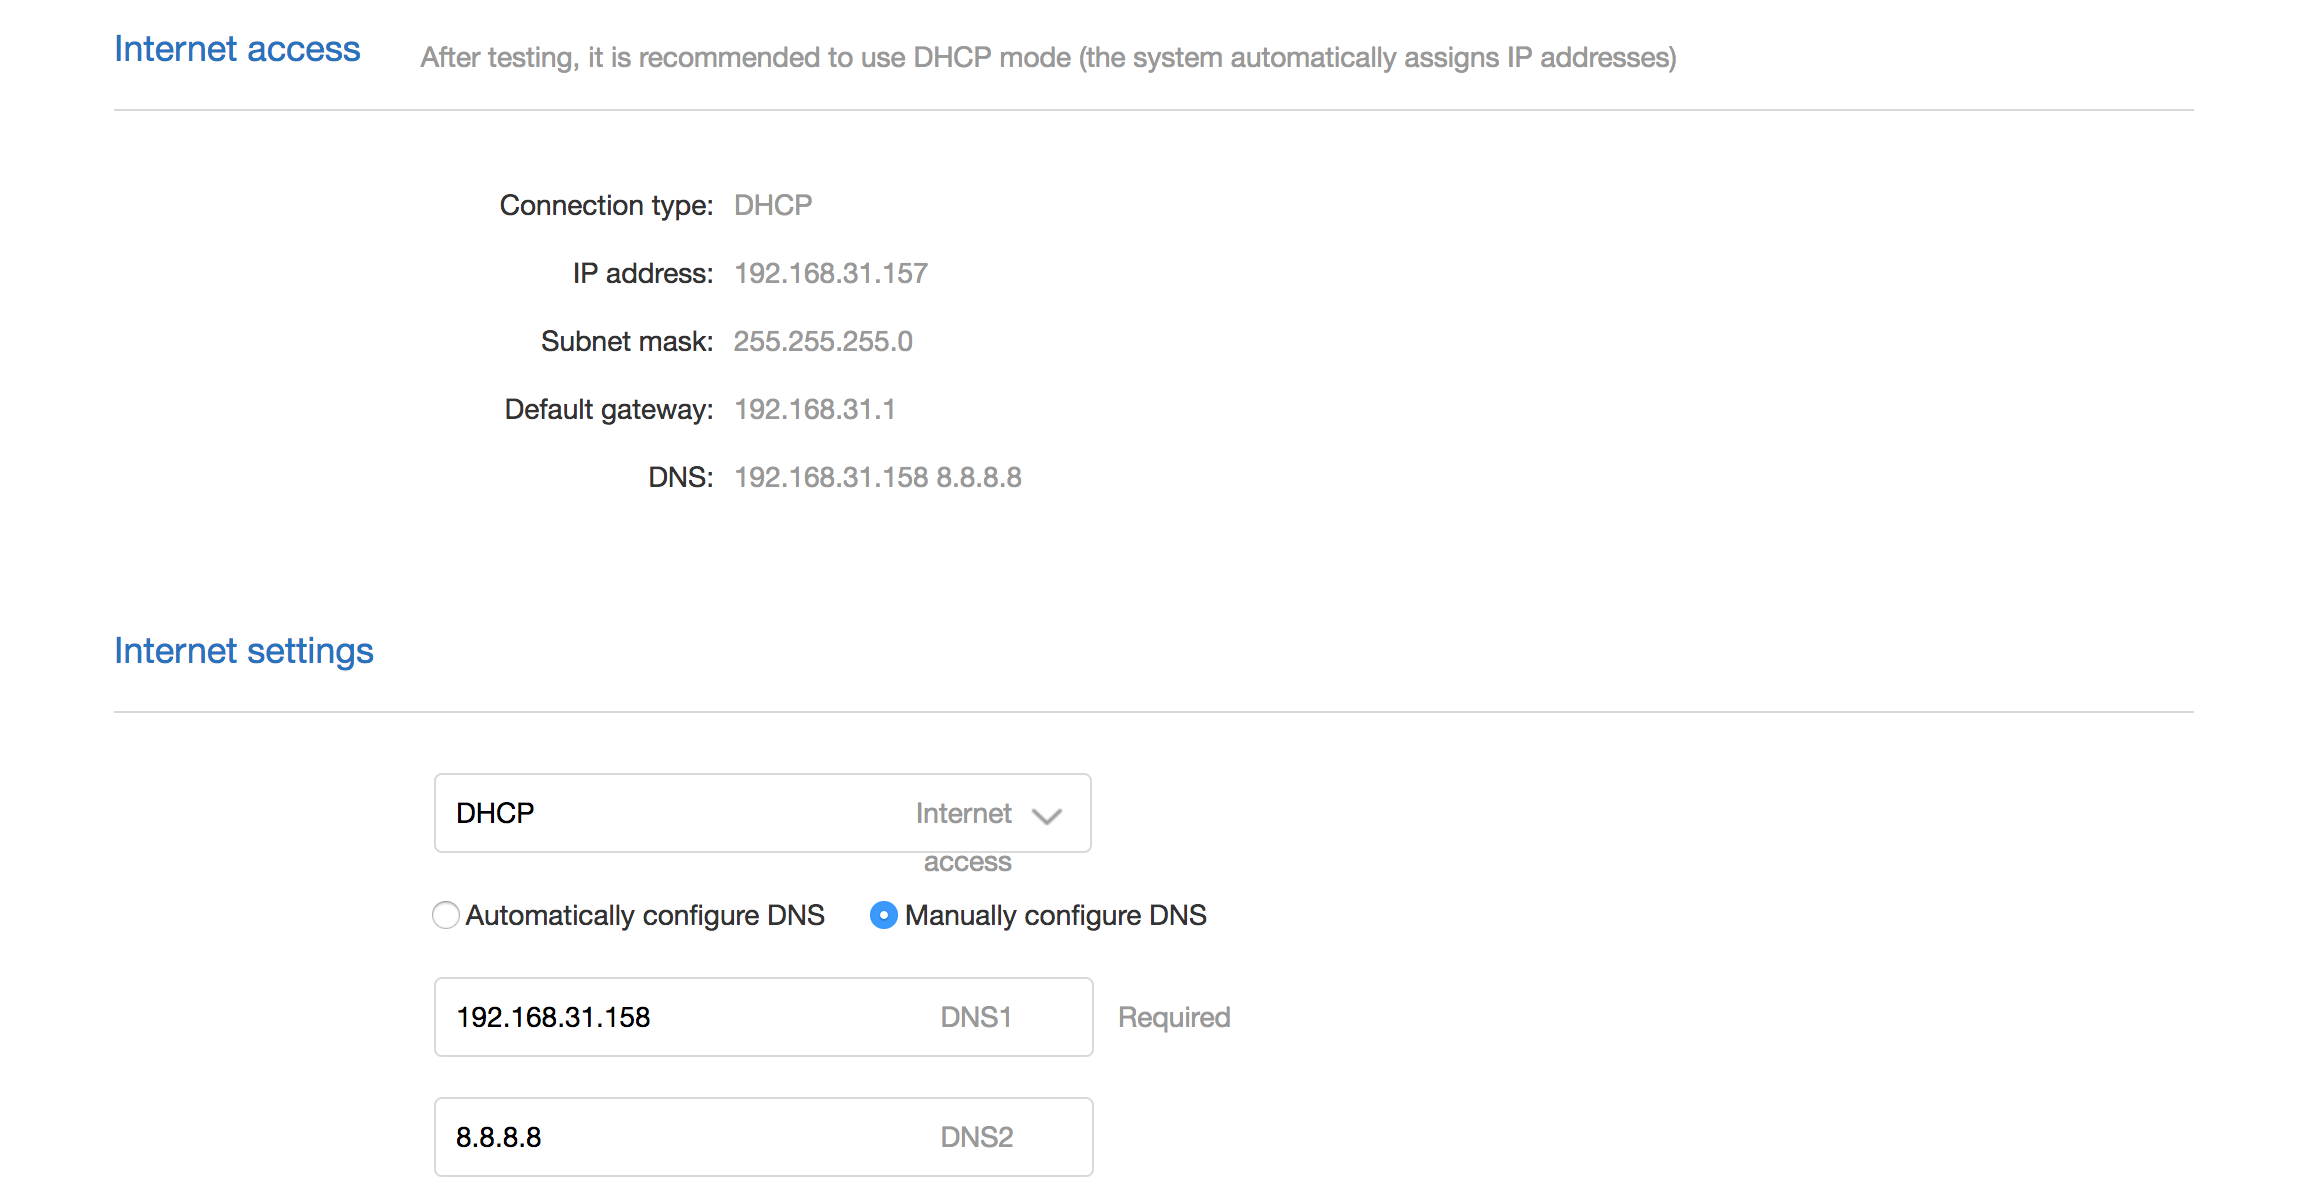
- Find the type of internet access and select DHCP under internet settings.
- Select Manually Configure DNS
- DNS1: IP address of Raspberry Pi
- DNS2: IP address of google in case Raspberry Pi is not working.
- Apply the new settings and reboot your router.
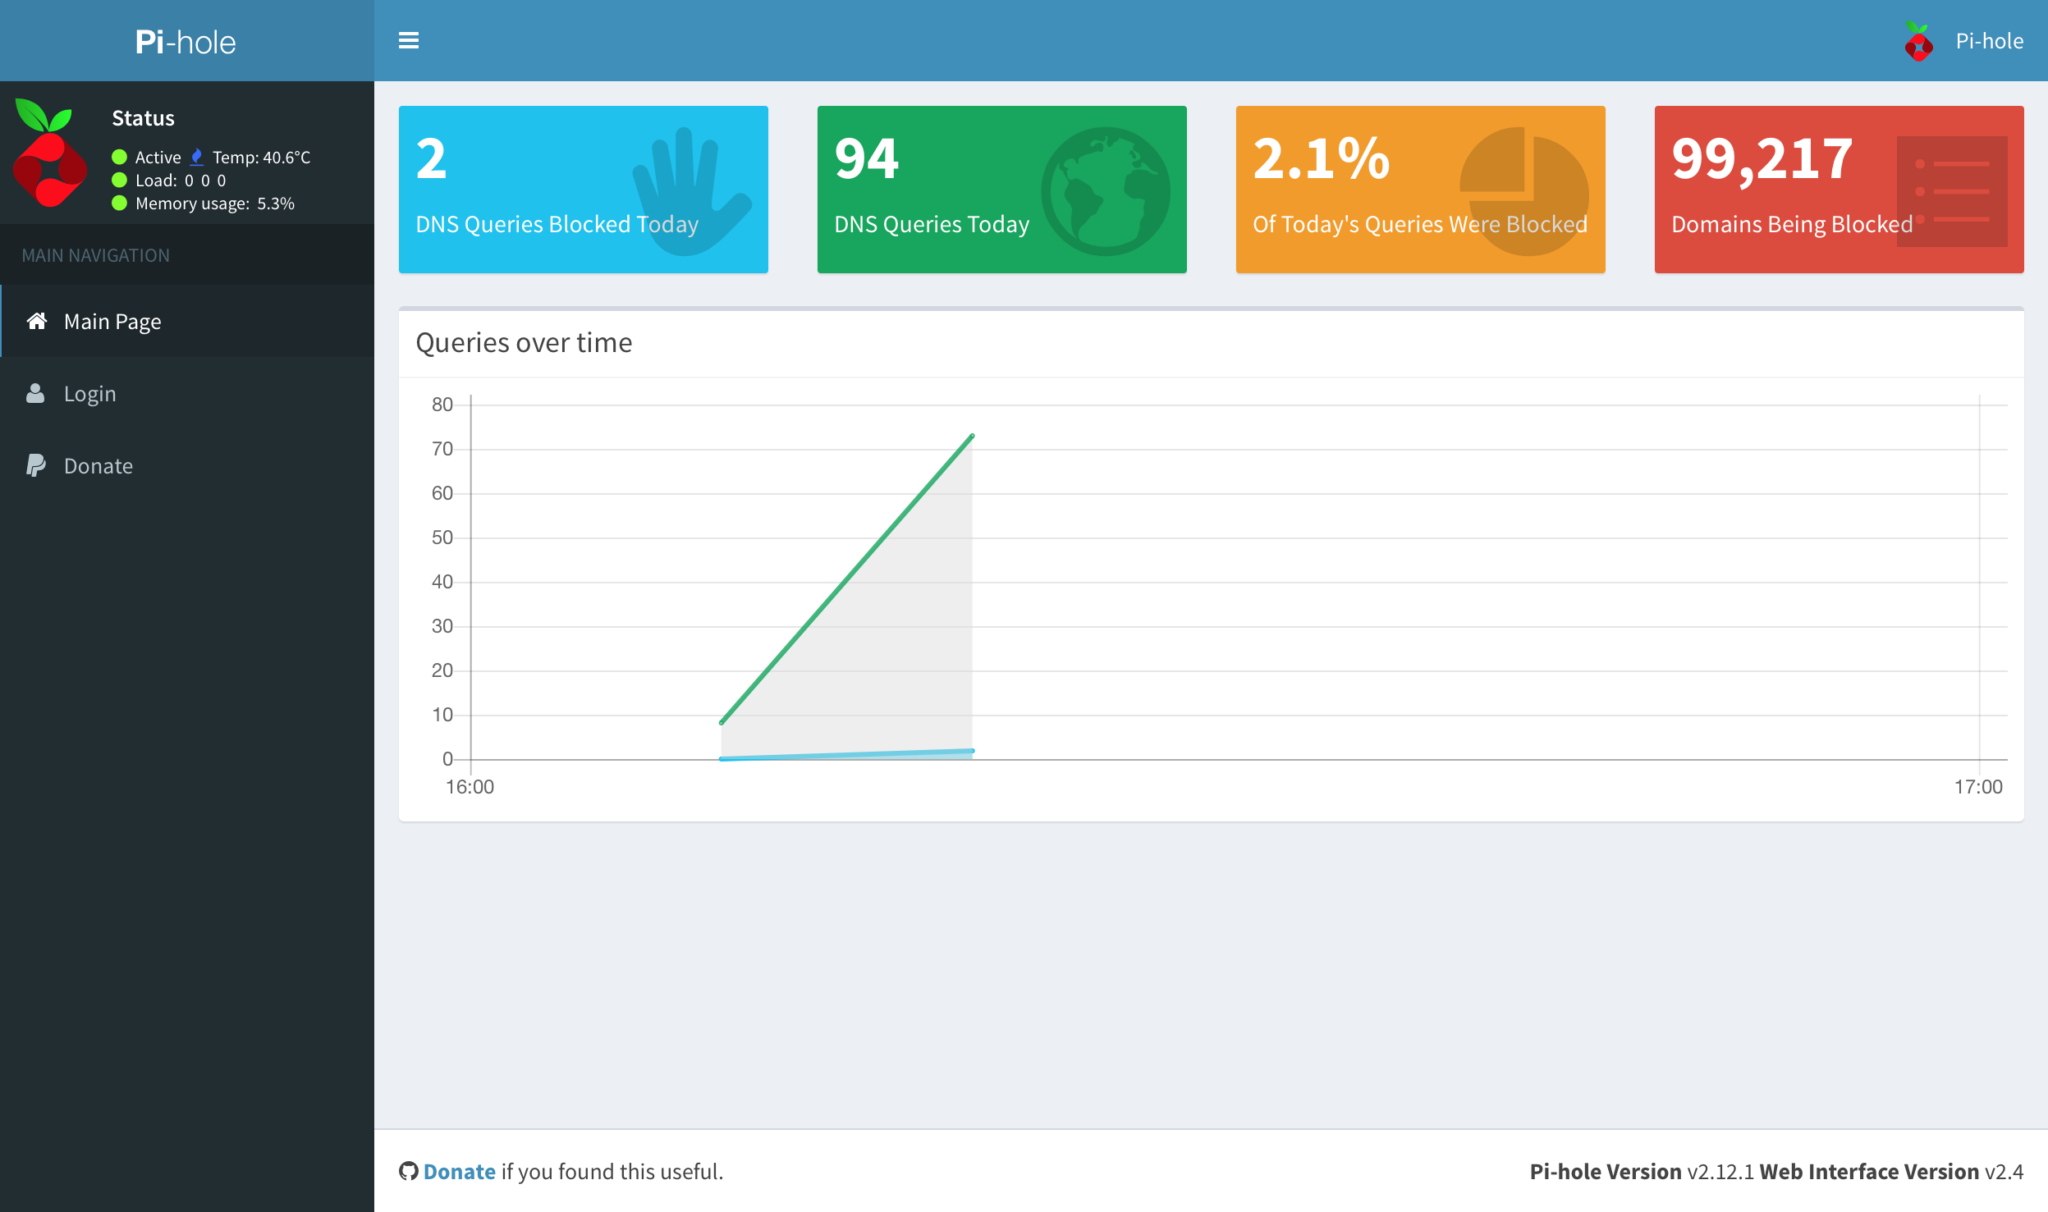
Now, you can log in to your Pi-Hole using: your-ip/admin/ (ex: 192.168.31.158/admin)
This is what it looks like:
That’s It!!!!
Let us know if you were able to turn you Raspberry Pi into an Ad-Blocker. Also if you faced any problems during installation.
Also Read: How to Use Wireshark to Capture, Filter and Inspect Packets






Why is the Mac install info so complicated? Even the RaspberryPi site states that we should use https://etcher.io/
Well As you can read the title is How to configure Network ad blocker, and not how to install OS on Raspberry Pi. The method is only mentioned for reference and you can choose whatever method you like.
I do not agree with adding Google’s DNS as the secondary address, Most people don’t know that most OS’s will cycle between the first DNS server and the second DNS server, On my Windows machine it seems to use the first DNS server about two thirds of time and the secondary about one third I am going to guess that Mac OS has the same behavior.
If a site you want to block uses your secondary DNS server it will get cached by the browser and or the OS and render your block list useless for some of the sites you visit
Your best bet is to either leave the secondary blank or run another instance of pihole on anther Pi or in a virtual machine.
Google’s DNS is Added because what if your Raspberry Pi is not working, or the DNS Server you have created is not working? It will automatically Switch the DNS to Google’s and you can browse the internet instead of wondering why the pages are not responding.
The reason you build a Pihole is to block ads and malicious web sites.
If the Pihole fails what you built is useless and not doing what you intended so in this case yes your network should go down and stay down until you fix it. I know this sucks but that’s the way it is.
I have Pihole running on two machines, One is an old crappy Laptop that I removed the monitor which was broken so I have to use SSH to connect to it, This has DNS and DHCP running on it.
I also run Pihole on a Virtual machine, This also takes care of DNS and DHCP.
Even when I was running Pihole on one machine the internet very rarely went down, and when it did I would have to fix it because I did not want ads or malicious web site’s on my network.
You also did not read my post carefully, When you put an alternate DNS sever in your network settings the computer will alternate from the primary to secondary DNS server, As I said above my computer alternates from the first server about 30 percent of the time to the secondary DNS server. Leave it blank or you will only be blocking stuff about 60 percent of the time.