Installing windows operating system on android device? Yes! It’s actually possible. You can actually install windows XP, Windows 7, Windows 8, Windows 10 on your android. Because of less processing speed of android than PC, windows will run slowly on android.
To install windows, your android phone should meet some minimum requirements.
Also Read: How to take a Screenshot in Windows 10
To install Windows XP,
First of all, you need to have enough space up to 1 GB in your internal storage of your android. Furthermore, your phone should not be very old with old specifications. And in addition, your phone should have minimum 512 MB of free RAM available.
In conclusion, Here are minimum requirements for your android to run windows XP
- Free Space 1 GB
- Minimum Available free RAM 512 MB
- Patience
Finally, if your phone meets above requirements we are ready to install our windows on your android phone,
Here is the short description about what are we going to do,
First of all, we are going to install our Windows XP to blank image file using PC. Because Installing windows using PC will speed up our installation process. And After installing windows on blank image file, we will transfer it to our android device by means of some third-party emulator application. And finally, start using Windows XP on our android device.
Let’s begin now,
First of all, download all the files below
Windows 98/Windows XP ISO file
After downloading above files finally, we are ready to install windows on android
Step 1
First of all, Install Qemu Manager on your PC, and start the software. Click on Red plus mark and create new virtual machine.

Step 2
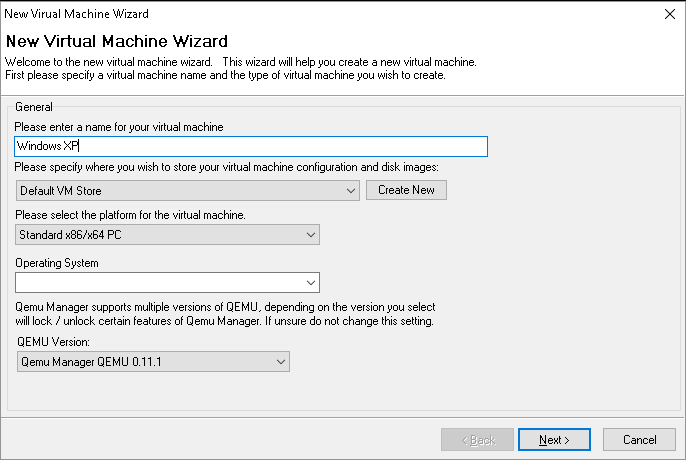
Enter the name whatever you want to name it in first text box. And keep other fields as they are. And click on Next. In our case we have named it as Windows XP.
Step 3
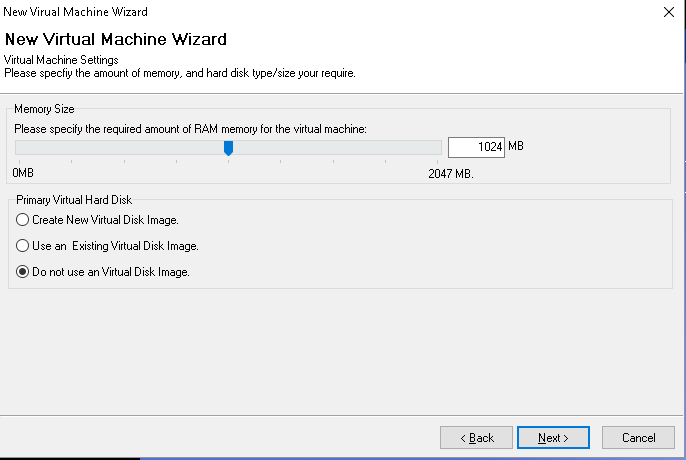
Allocate RAM for your Windows XP. This RAM is allocated from your PC’s RAM and It has nothing to do with your phone’s RAM. Then Select ‘Do not use an Virtual Disk Image’ option. And click on Next.
Step 4
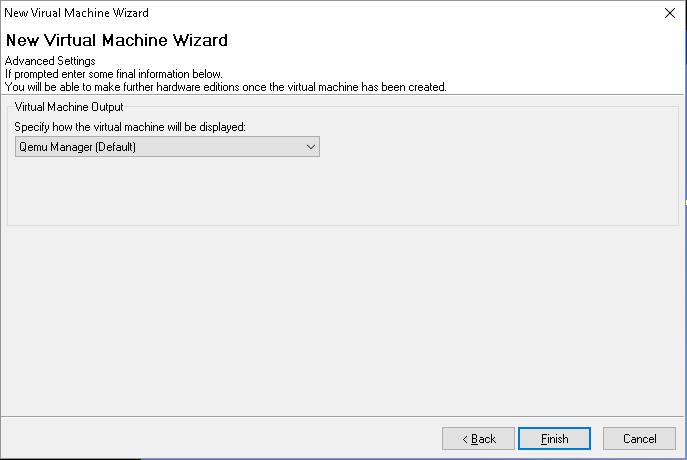
Finally, Click on finish.
Step 5
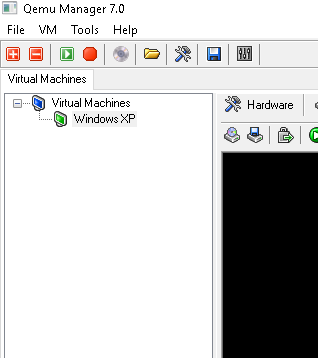
Now Virtual Machine of name Windows XP (As we had named it earlier) has been created. And Select Virtual Machine Windows XP on left column of your screen.
Step 6
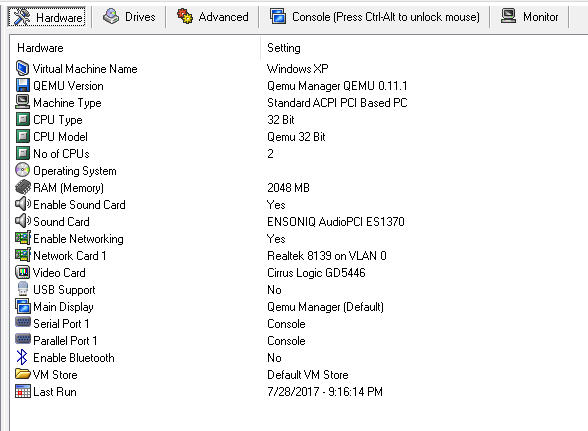
Now Select Hardware tab. And select No. of CPU’s either 1 or 2. And here we have changed our RAM to 2048 MB for faster installation.
Step 7
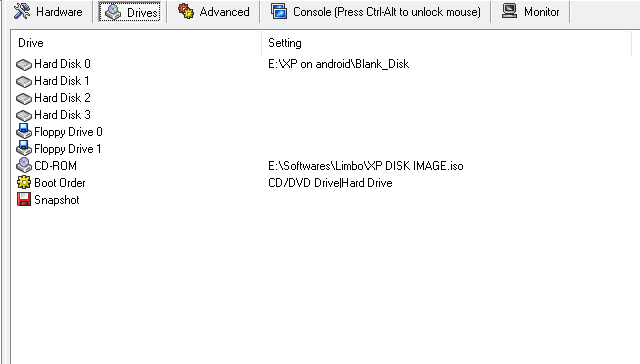
Now Unzip the downloaded Windows for Android2, Blank Disk Image, and SDL zip file. And Click on Driver tab. Double click on Hard Disk 0.
Step 8
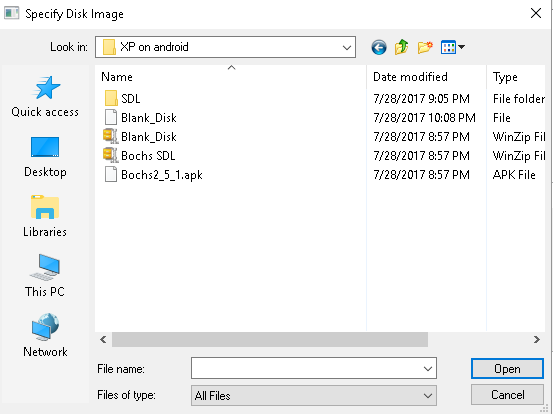
Make sure that File of type is selected as All files. And, Browse for Blank_Disk file and click on Open. And then Ok.
Step 9
Similarly, in drive tab double click on CD-ROM and browse image file of our Windows XP, we had downloaded earlier. Click on Open. And then Ok.
Step 10
Now click on Green Launch selected VM button. Make sure that Windows XP Virtual Machine is selected.

Step 11
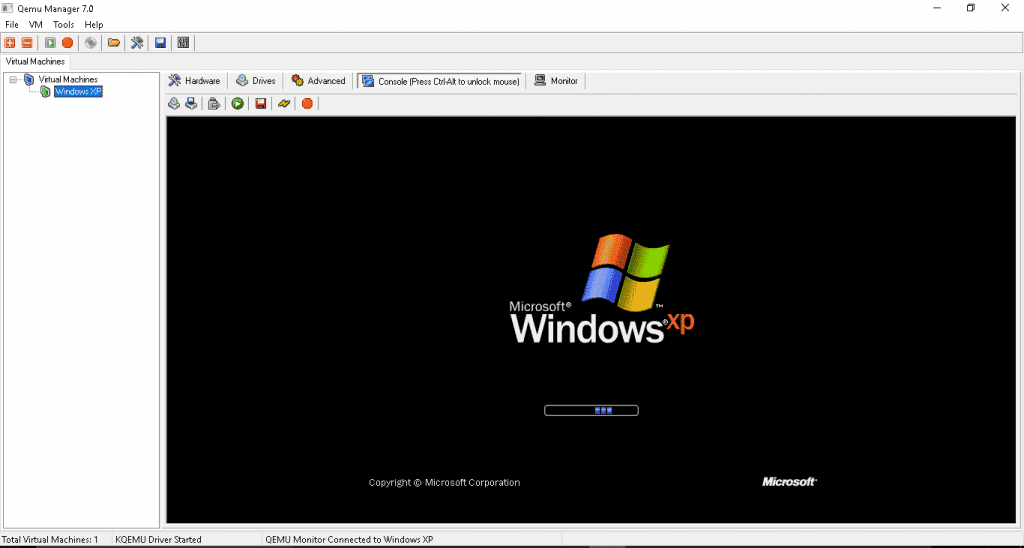
Now simply install Windows XP as usual. Installation time will depend on your system.
Step 12
Now move your Blank_Disk file to SDL folder. Blank_Disk file is no more blank now. As you have installed windows XP in it.

Step 13
Now rename your Blank_Disk file as ‘c’.

Step 14
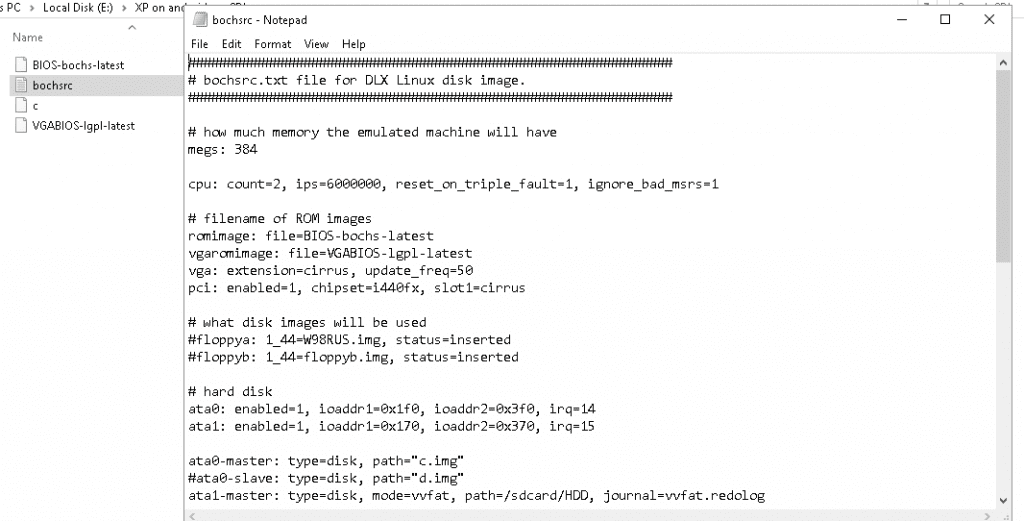
Now Open bochsrc text file.
Step 15
Replace “c.img” to “c”. And Save the txt file.

Step 16
Transfer the Whole SDL folder to your android device (internal storage is preferred).
Step 17
Finally, Install Bochs Apk file in your Android. And simply open it. Since we have already installed windows using PC Bochs will automatically detect windows image file on your device and will start windows XP. Speed of Windows XP booting will depend on your Device specifications. Depending upon your device first booting can take 5 minutes to 20 minutes.
Thanks for reading


