Nothing beats a scanner when it comes to storing documents digitally. A scanner enables one to take high-resolution images of the documents you have and store them efficiently on your local device or in the cloud. But, when all is said and done, a scanner itself is a bulky and expensive piece of hardware. An alternative to the hardware scanner would be the software scanner or the scanning apps for smartphones and tablets. A widely popular app for this exact purpose is CamScanner.
For those who need to handle a lot of documents, CamScanner is a boon. Especially for students, who need to copy and keep notes. The CamScanner website says “Turn your phone and tablet into scanner for intelligent document management”. And that is absolutely right. With features like intelligent outline detection, editing on the go, high-resolution scan, and also hand-written annotations, CamScanner is the perfect scanning app for your needs. But, one may be demotivated due to no support for PC on Windows 8/8.1/10/7/xp & Mac. However, that won’t be an issue anymore.
Also Read: How to take a Screenshot in Windows 10
CamScanner on PC using BlueStacks
For those of you who have felt the need to run Android applications on your PC, you must have heard about BlueStacks. It is an Android emulator for your PC that allows you to access an Android environment from the program and run your favorite apps. You can use the very same emulator to install and use CamScanner on your PC too. And the process to do so is fairly simple if you already have experience with an Android smartphone.
An Emulator is a software that is used to mimic a software environment on an entirely different software or platform. For example, BlueStacks and Nox are emulators for your PC which emulate the Android environment. After you install an emulator software, the following steps are a breeze if you are already familiar with the environment. This is applicable to Android emulators too. No matter the emulator, you can simply install the apps from Google Play Store by directly searching for them and installing them. It is as simple as operating an Android smartphone or tablet.
For those who have been using Apple products and are not familiar with the installation process of Android, you need not fear. We are going to run you through the process of installing CamScanner on your PC.
Installation Process
1. First and foremost thing to do is installing BlueStacks on your PC. This is as simple as just downloading the program and installing using the installer. And, the software is absolutely free of cost.
Download here
2. Next, you need to set up your BlueStacks installation with your Google account in order to be able to use various Google services such as Play Store and others. This is necessary to download and install applications from the Google Play Store.
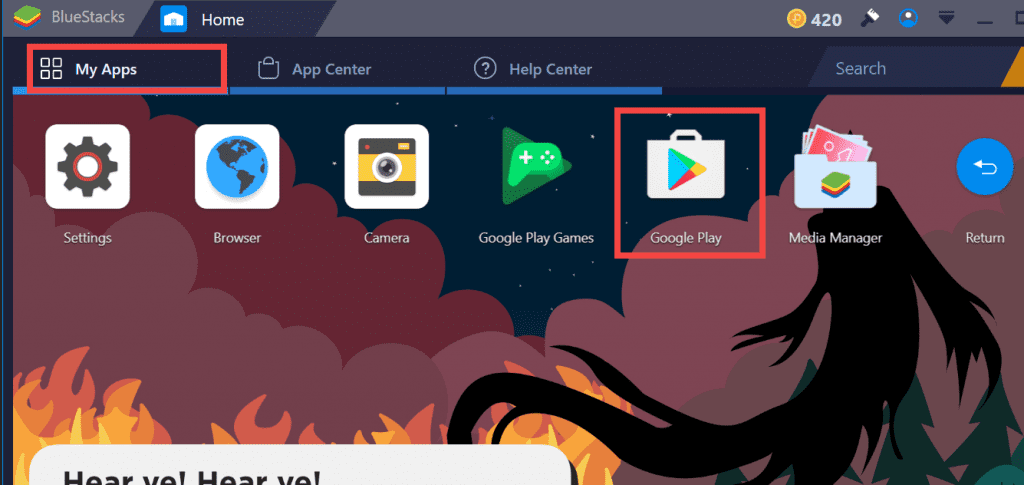
3. Once done, you have to open the Play Store app which can be found under the My Apps tab on your BlueStacks home screen.
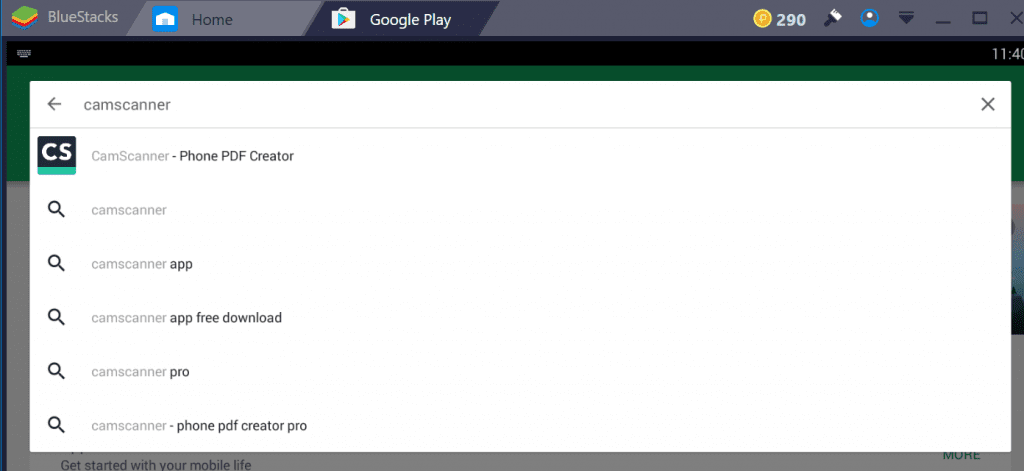
4. Search for CamScanner using the search bar and click on the first option.
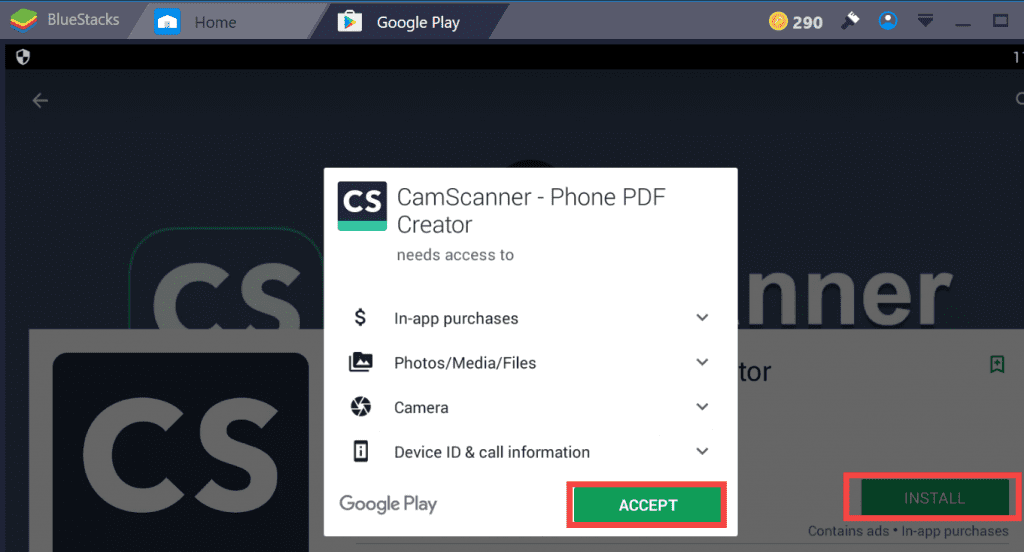
5. Click on install and that’s it. Depending on your internet connection, it should take anywhere from a few seconds to a couple of minutes for the app to get installed.
6. You are done. Now, you can just go ahead and run the app to start using it.
You may be disappointed with the scan quality if you decide to use a low-resolution webcam to scan. But, if you manage to procure and use a high-resolution one, then you will have the same functionality on your PC too.
Conclusion
The reason why one would install CamScanner on their PC and not search for another solution is that because of its versatility. You can directly convert your scanned documents to PDF format, enhance the images, add more images to the already scanned documents, and much more. You also get the option to instantly share your documents. The cloud-save option of CamScanner is also very useful. However, one of the really important reasons to install and use CamScanner on your PC would be sharing options. Once you have a document or image on your PC, the number of ways you can share them is just limitless.
Also, using an emulator on your PC allows you to make mistakes without damaging your hardware. Installing and using CamScanner on an Android emulator on your PC would enable you to work with it without worrying about any kind of hardware failure problem due to bugs and other problems.
Also read: How to root BlueStacks 3 for Android


