A time comes in almost everyone’s life when one needs to share an entire screen. You may be writing a blog instructing others to do something. Or it may be a troubleshooting article showing step-by-step the process to follow in order to solve the problem. There are many use cases where one requires a screenshot of the entire screen or part of it. You have the option to rely on third-party programs to do so. Or, you could just go ahead and use the built-in feature of Windows 10. Windows 10 has a couple of ways that allows you to take screenshots and edit them.
Methods to take a Screenshot in Windows 10
There are many ways to take screenshots in Windows 10. We are going to tell you about a couple of them. Keep on reading and become a pro in taking screenshots on your Windows 10 machine.
1. The Prt Sc key
Yes, that’s right. The mysterious button on your keyboard somewhere close to the Delete key and the Num Lock key is used to take screenshots of your screen. It is labeled differently by different manufacturers. You may find the key labeled as “Prnt Scrn”, “Print Scr”, or “Prt Scn”. But, it does it in a pretty surreptitious way. You won’t realize that you have taken a screenshot until you use an image editing software to paste the screenshot which is sitting in your clipboard. That’s right, the screenshot is saved to your clipboard to paste into an image editing software (Paint would do) to export it. Thus, you can take a screenshot without saving it.
2. Windows button + Prt Sc key
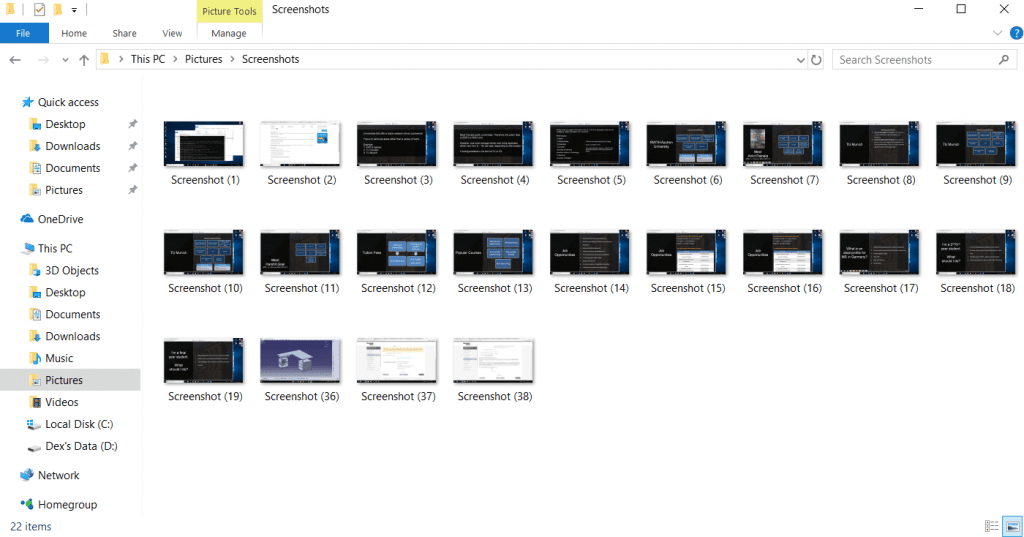
Now, you may be confused as to why does the Prt Sc key pop up again. Well, because it can take screenshots in another way too. And, that is by directly saving it to your Pictures folder. You will find your screenshots in the Screenshots folder inside Pictures. You can edit them later as per your convenience. This is pretty useful if you are in a hurry to take screenshots and don’t mind being able to not edit them at that moment. You will realize that the process of taking screenshots this way is a bit different, as your screen would dim for a moment as if a shutter is going through the screen. This marks the screenshot is taken and saved. This way, you can take a screenshot and save it as a file.
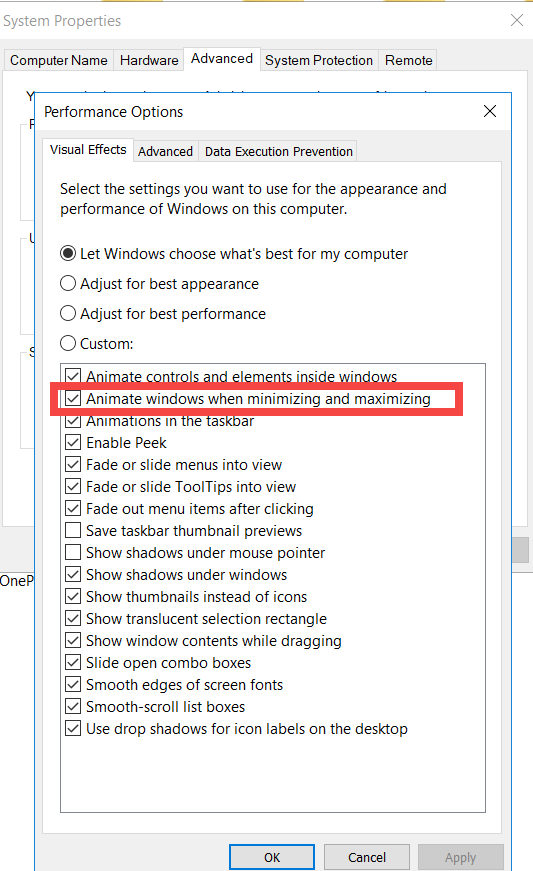
The “Animate windows when minimizing and maximizing” is responsible for the dimming of the screen while taking the screenshot. You can turn it on in your visual effects settings (System -> Advanced system settings -> Advanced tab -> Settings under Performance section).
3. Windows button + Shift + S
This is a new feature which comes with Windows Creator’s update. When you execute the above key combination, your screen greys. You can then use your mouse click and drag on the area whose screenshot you want to take. This screenshot will then be available on the clipboard for you to edit and/or save using an image editing software such as Paint. The best thing about this method is directly being able to take a screenshot of the part of the screen which is required and not the whole screen. You can save a lot of time by not going through the unnecessary process of cropping out the unrequired part from the screenshot later on.
4. Alt + Prt Sc key
This is yet another useful shortcut which allows you take a screenshot of only the active window and not the whole screen. And just like before, your screenshot will be available on the clipboard to paste and edit. Make sure to paste it and save using an image editing software before you go on copying anything else on the clipboard.
Note: In some computers, you may need to press Alt + Fn + Prt Sc keys to use this feature.
5. Snipping Tool
If you want more control over the screenshots you take, then you can use the Snipping Tool. This is a default app which comes pre-installed on Windows 10. You can access it by going to Start -> Window Accessories -> Snipping Tool.
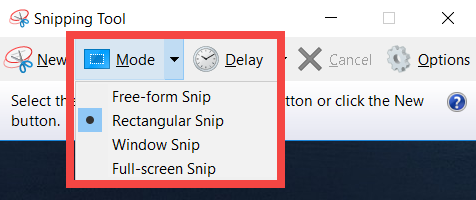
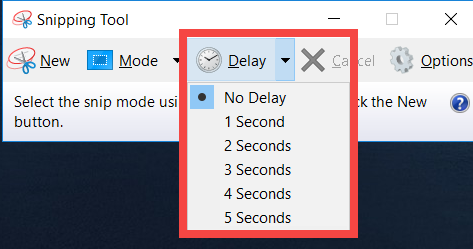
There are a bunch of options to play around with in the Snipping Tool. You can choose the Mode which allows you to select the boundary of the screenshot in different ways. You can also delay the screenshot for up to 5 seconds.
This allows you to time an event whose screenshot you want to take. You can also tweak options to allow for more functionality. It is a fairly basic and easy to use app.
6. Screenshot using Game bar
Yes, you can do that too. But, there is a catch. You need to open Game bar in an app whose screenshot you would like to take. You can do that by pressing Windows key + G. This will prompt you to define that app as a game and allow you to bring the Game bar without any hassle from that point in time. You can then use the Game bar shortcut to take a screenshot. You can view the screenshot from the Xbox app.
Conclusion
The methods mentioned above are some of the ways in which you can take a fairly basic screenshot in Windows 10. If you want more editing options and more productivity, you can try out any third-party screenshot app available online. Those would allow you to do much more than just take a screenshot and save it. For example, if you need to take a screenshot of a scrolling web page, then you need a third-party app as Windows 10 doesn’t provide such a feature. It all boils down to the need. If you don’t need any such advanced feature and work with screenshots not very often, then the built-in tools are more than enough to satisfy your needs. But, if you are one who constantly needs to work with screenshots and can really use advanced features, then you would need to go for third-party solutions.
Also read: How to activate Game Mode in Windows 10


