One of the most annoying problems faced by Windows users is high disk usage. Microsoft has not been able to solve this problem irrespective of their continuous upgrades in the form of Windows 8, 8.1, 10. The center of this problem is the Wsappx process, which is found in the task manager.
What is Wsappx Process?
According to layman terms, Wsappx is a process which is responsible for handling and managing Windows Store and the associated applications in Windows 8/8.1/10. The Wsappx process manages all installing, uninstalling and updating processes for the various Windows Store Applications. Wsappx is divided into two main categories which are as follows:
- AppXSVC: It stands for AppX Development Service and it helps in providing infrastructure support which is essential for deploying the various Store Applications.
- ClipSVC: It stands for Client License service and it helps in providing infrastructure support for Windows Store.
Chances are maximum that Wsappx is the culprit behind your high disk usage and to check whether this is true or not follow the following steps.
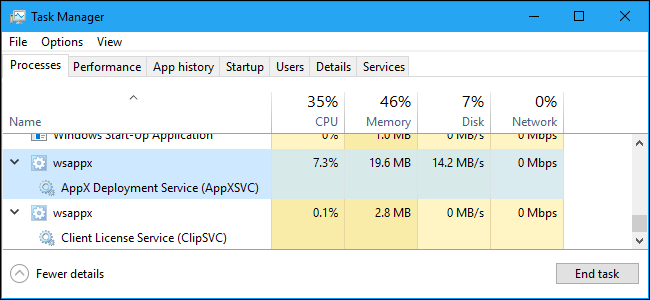
- Open Task Manager (you can do this by using the Ctrl+Alt+Del key combination)
- Find out the process occupying the maximum disk usage and right click on it.
- Select “Details” and again right click on that same file and select “Go to Services”.
- Find out the process and confirm it whether it’s a part of the Wsappx process or not.
Why Wsappx Process consumes almost 100% of the disk usage?
The Wsappx process manages various types of Windows Store applications like Mail, People, Paint 3D, etc. These apps have a higher frequency of updating themselves. Due to such repeated updating of those apps, the disk usage becomes 100% and as a result of which the device starts lagging. (One thing to note that Wsappx process is not a virus or a malware).
Now let us discuss the various ways to disable Wsappx process.
-
Disabling Windows Store
Disabling Windows Store has some drawbacks to it like you won’t be able to use Windows Store once you disable it and you might also face several issues with the Windows Store applications.
Moreover, when you disable Windows Store, the Wsappx does not get disabled, it will only ensure a minimum load while loading the various Windows Store associated activities. So you need to consider well before disabling Windows Store.
You can disable the Windows Store using two different methods.
-
Registry Editor
- Type Registry Editor in the start search bar and press enter
- Choose “HKEY_LOCAL_MACHINE\SOFTWARE\Policies\Microsoft” and copy the above address in the Registry Search bar present at the top.
- Select the Windows Store and right click on the right panel and then select New.
- After that choose the DWord(32-bit) folder. (If you are unable to find any folder under the name Windows Store, then you’ll have to create one. For creating a folder right click on Microsoft folder and select New and then select Key and name it as Windows Store and press enter.)
- Rename the folder as removeWindowsStore
- Now, create a new DWORD value in the Windows Store key and enter the value 1 within it.
-
Group Policy Editor
- Open Computer Configuration and select Administrative Templates
- Select Windows Components and then select Store.
- Now double click on “Turn off the Store Applications” from the right Window panel and then select Enabled and then click on Apply.
- Restart your computer once before using.
Disabling AppXSVC and ClipSVC
-
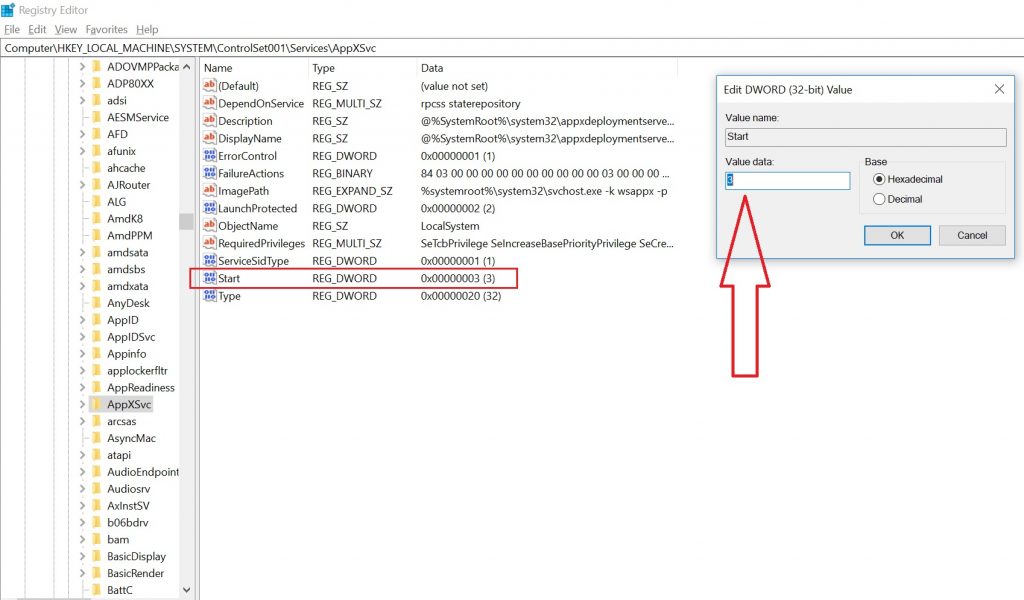
AppXSVC
- Enter “Regedit” in the start search bar and press enter.
- Select “HKEY_LOCAL_MACHINE\SYSTEM\Controlset001\Services\AppXSvc”
- Copy the above address into the Registry Search tab.
- Now open “Start” file from the right Window panel and replace the value “3” to “4”
- Restart your computer once before using it.
-
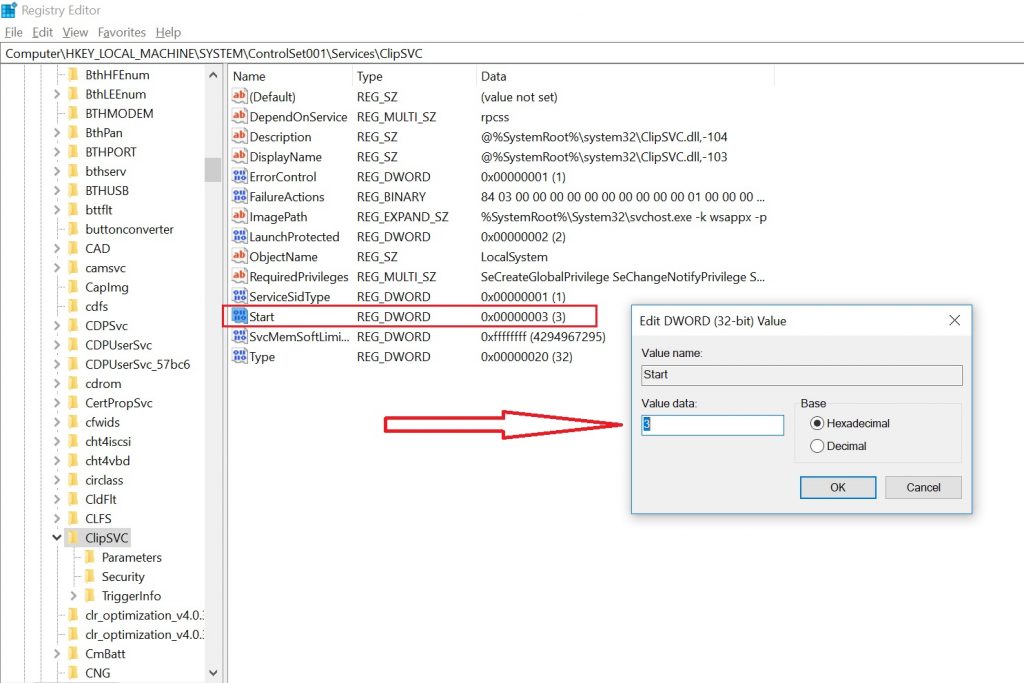
ClipSVC
- Enter “Regedit” in the start search bar and press enter.
- Select “HKEY_LOCAL_MACHINE\SYSTEM\Controlset001\Services\ClipSvc”
- Copy the above address into the Registry Search tab.
- Now open “Start” file from the right Window panel and replace the value “3” to “4”
- Restart your computer once before using it
Must Read – Windows 10 Error 0x8024a105 | Windows 10 800 Million+ Devices
Conclusion for the Wsappx Process Issue
If you face similar problems even after performing the above-mentioned steps, then you need to analyze the applications consuming the maximum disk space, from Task Manager. Often applications like Google Chrome, Skype, Windows Search, etc. are also responsible for the 100% disk usage.


