DNS plays an important role in determining your Internet Speed. Changing your default DNS to Google DNS will definitely boost your Internet Speed. Here’s how you can do this.
What is DNS?
DNS is the acronym for Domain Name Space and is a concept of Computer Networks. DNS in Layman terms is a centralized system which is responsible for converting Domain Name Space to the respective IP address and vice-versa. We all know Computer only understands Binary numbers. So, when you enter www.google.com, the DNS converts this domain name to IP address of Google and then the connection is further established. By default, DNS is provided by your Internet Service Provider (ISP). But, the default DNS gives you less bandwidth and your Internet Speed becomes slow. By changing your Default DNS to Google DNS, you can get the maximum bandwidth of your Internet Connection.
Steps to Change Default DNS to Google DNS for the faster Internet:
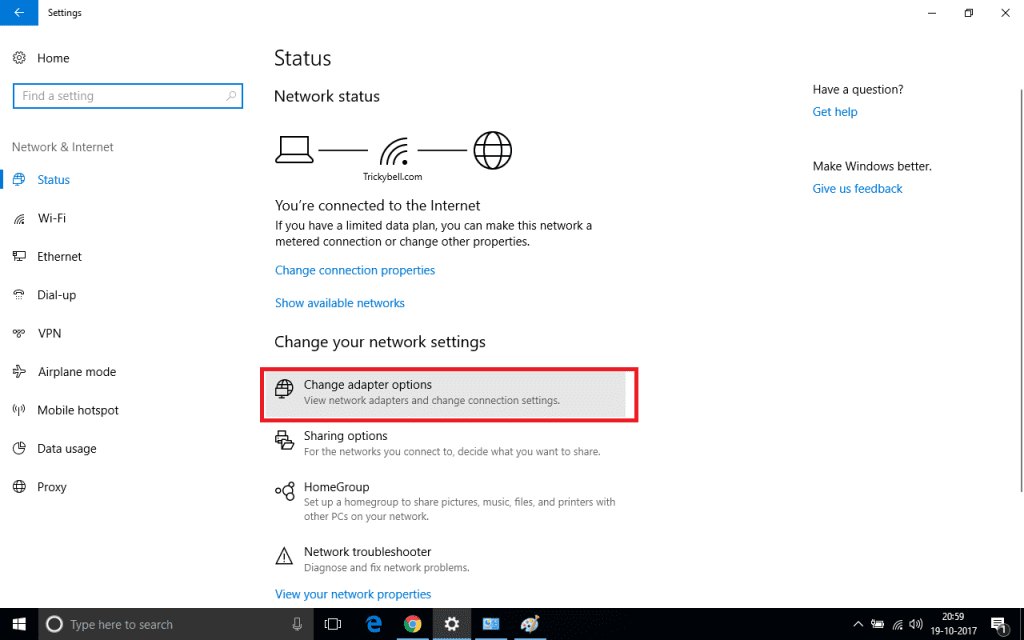
Step 1: In your Windows PC, Go to the Settings and click on Network and Sharing Center (Network and Internet in Windows 10).
Step 2: Navigate through the options and click on Change Adapter Options as shown below.
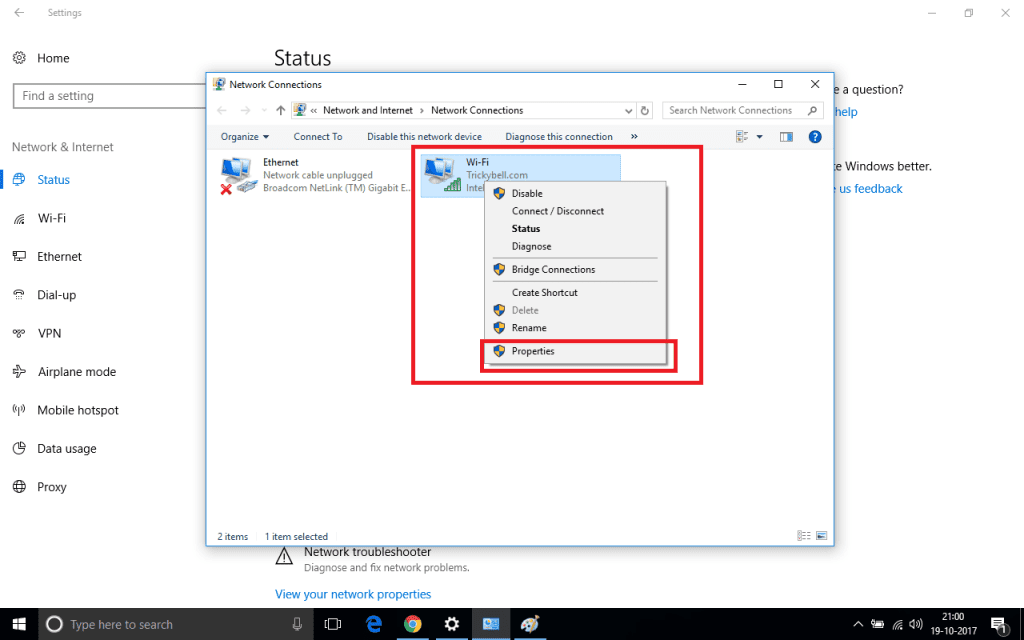
Step 3: Select your current network –> Right Click and select Properties.our current network –> Right Click and select Properties.
Also read: Ever Wondered Why C is Default Drive on Computer, not A, B or C?
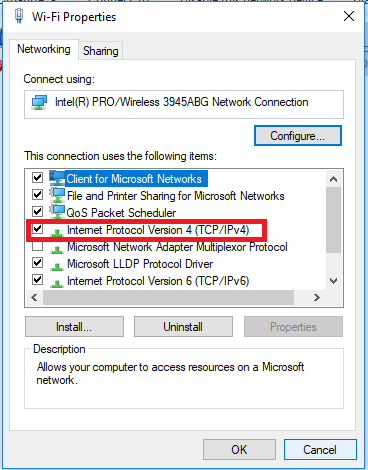
Step 4: A dialog box will appear. Select on Internet Protocol Version 4 (TCP/IPV4) and click on Properties.
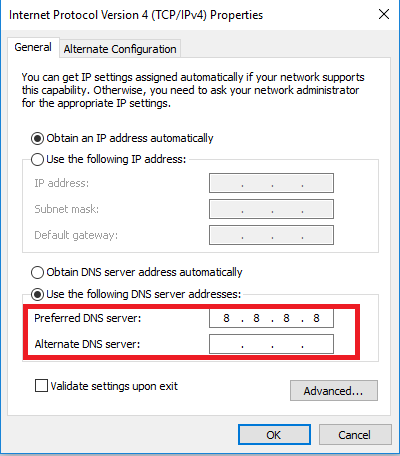
Step 5: Again a new tab will open. Here you will see an option to change IP Address and DNS manually. Click on the Radio Button Use the following DNS Server address and in the Preferred DNS Server type 8.8.8.8. You can leave the ALternate Server address as Blank or you can enter 8.8.4.4.
Step 6: Apply the Settings and then restart your network. Now you are switched to Google DNS rather your ISP’s default DNS. You will see the change in speed of your Internet Connection after performing the above steps.
Conclusion:
There are other options available to change your default DNS to Google Public DNS. You can also do the same thing by downloading open-source software. But the method described above is easy and it takes hardly 2 minutes to change your default DNS to Google Public DNS. I have been using Google Public DNS from past 2 months and have experienced faster loading of web pages. Downloading speed has also increased.
If you have any queries/ suggestions then please comment down below. We will try to get back to you as soon as possible.
You May Also Like: Best iPhone Data Recovery Software for Mac


